Getting started
This guide shows the shortest practical path from scratch to a working Seatmap Pro booking view on your selling page.
If you prefer a video flow, use the walkthrough:
Seatmap Pro components
The end-to-end flow includes four components:
- Editor: create venues and schemas, manage pricing, and publish changes.
- Booking Renderer: interactive chart on your website/mobile selling page.
- Admin Renderer: operational tools for managers and support teams.
- Booking API: backend control for events, seat state, locks, and sales.
High-level runtime flow:
- Manager configures venue/schema in Editor.
- Your backend creates event and manages seat state through Booking API.
- Customer opens selling page where Booking Renderer loads by
publicKey+eventId. - Selection/checkout updates availability, and Renderer reflects latest state.

Step 1. Draw and publish your first schema
Start in Seatmap Editor.
Editor access can be:
- provided by Seatmap Pro (SaaS), or
- deployed in your infrastructure (on-prem via Docker/Kubernetes).
- Open the venue list after login and select an existing venue or create a new one.
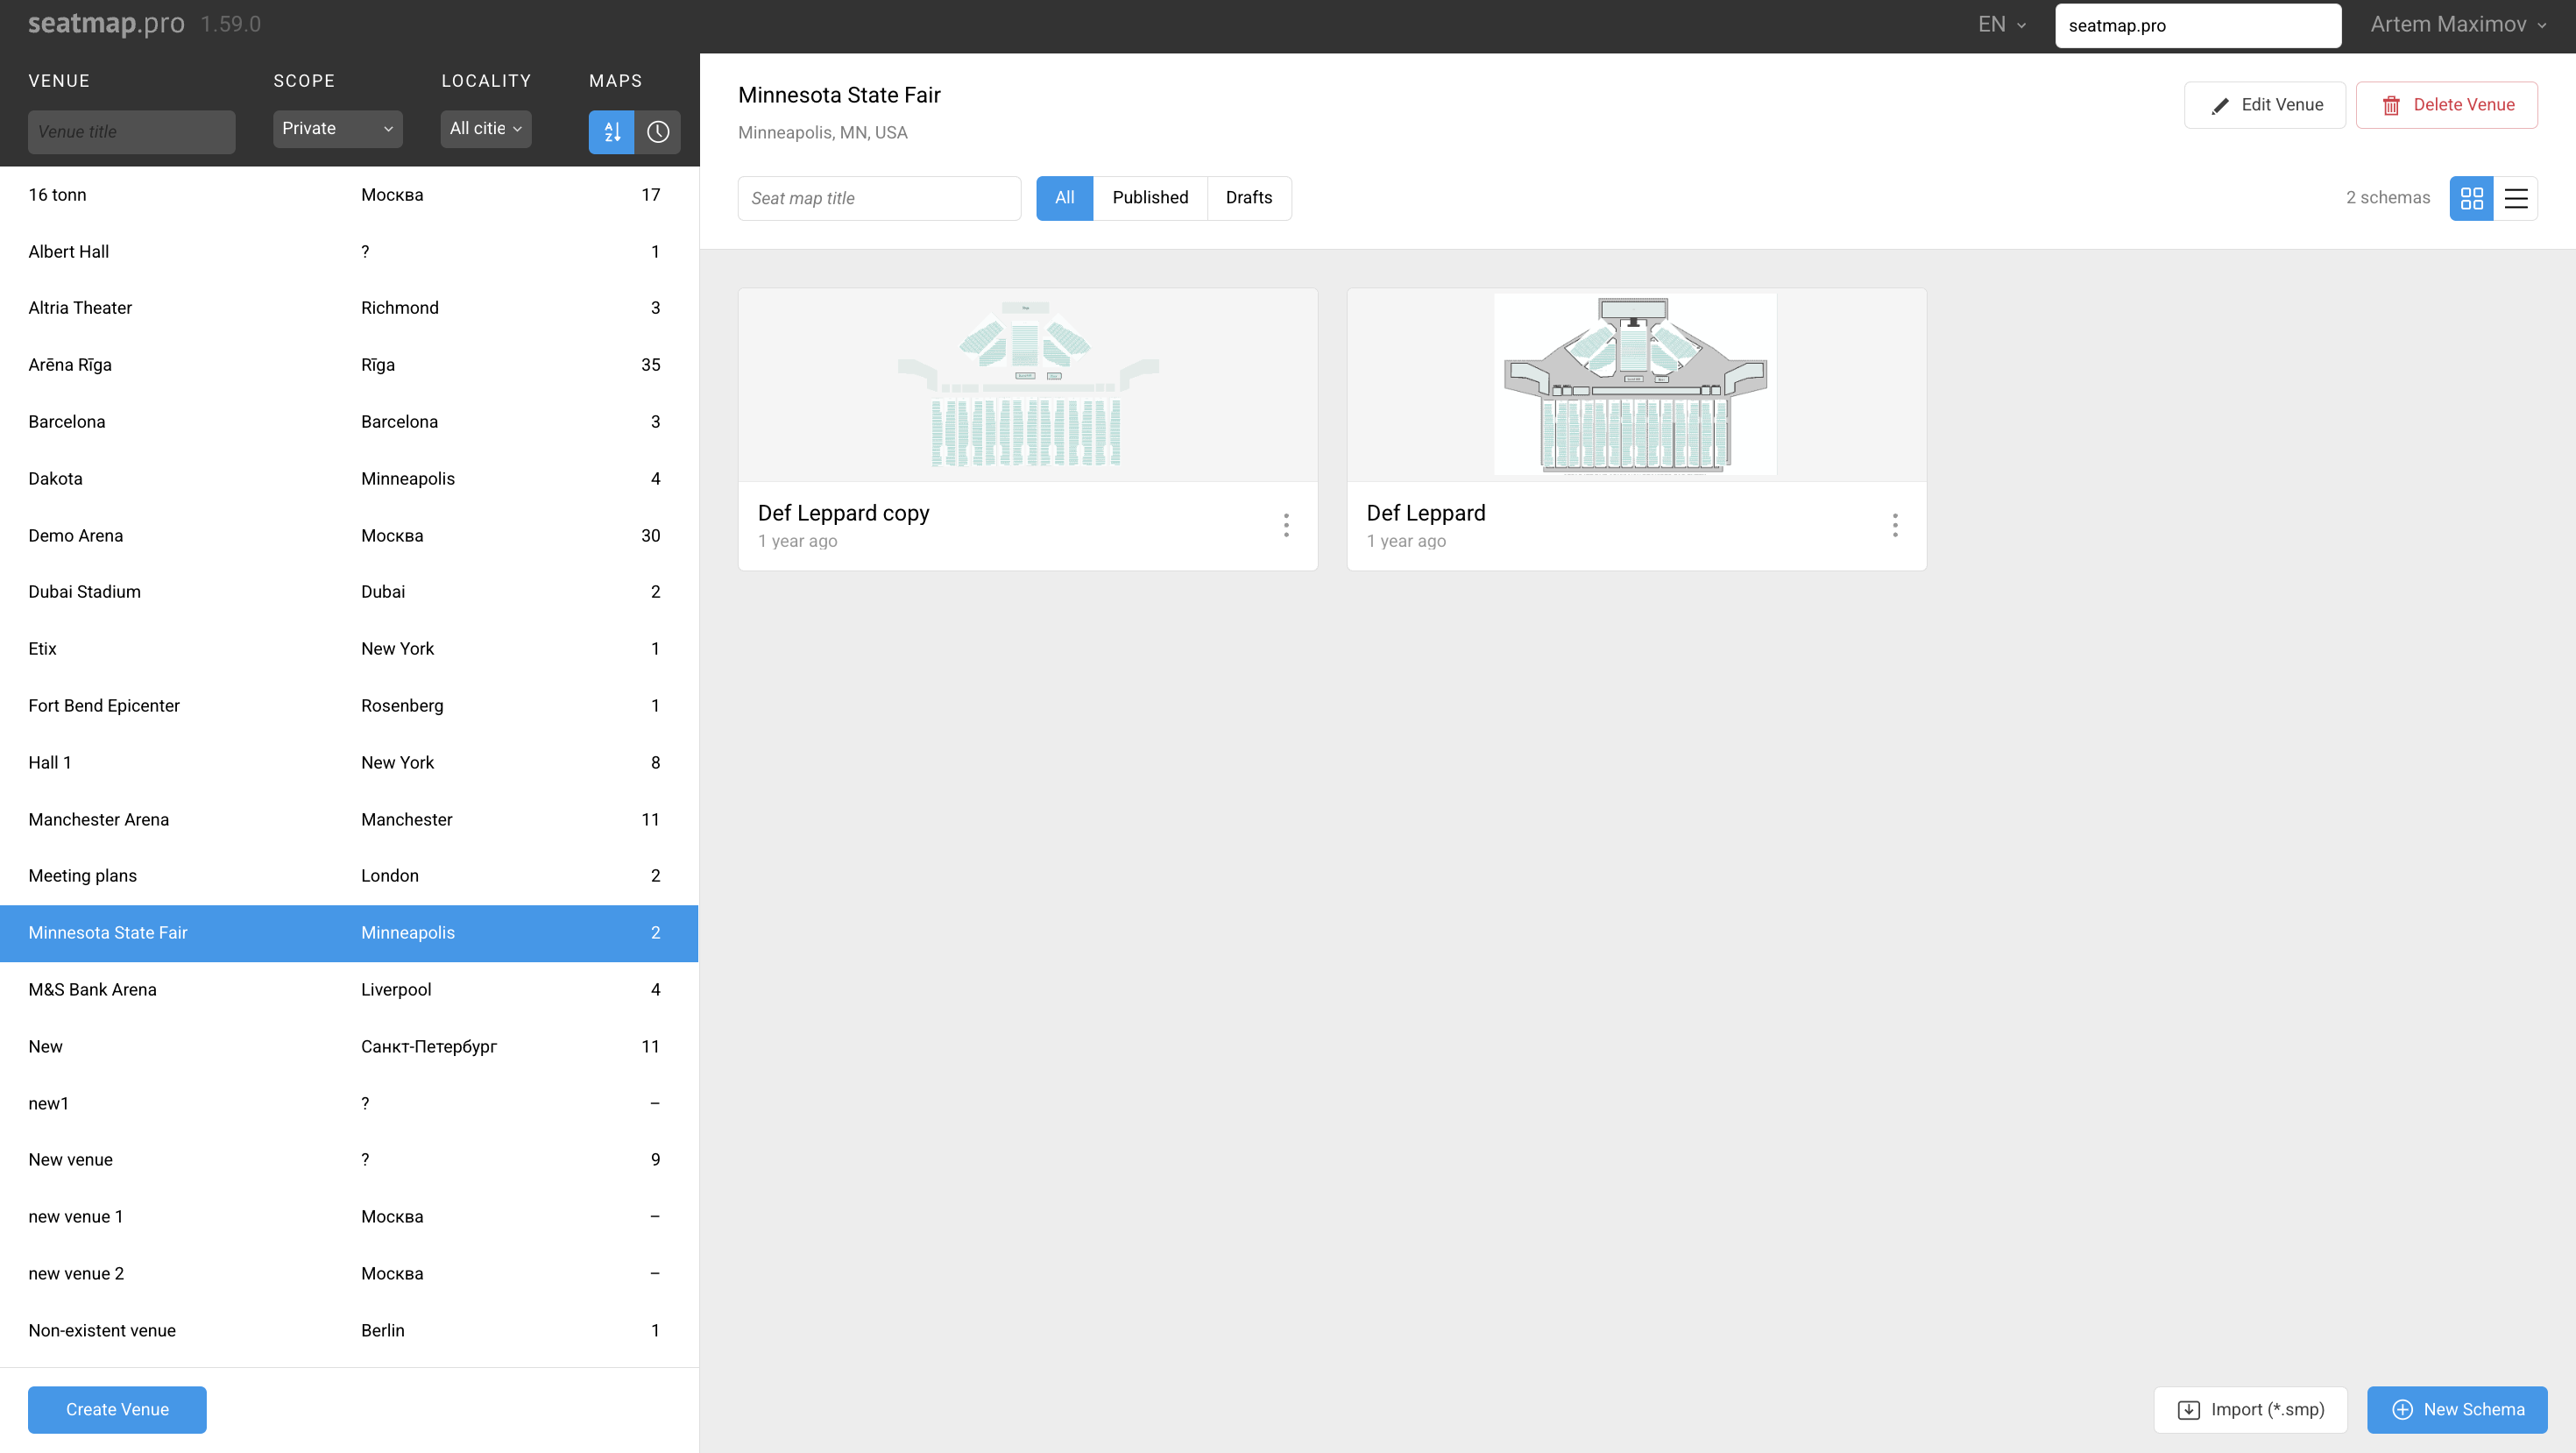
- Open schema editing workspace and design the layout (sections, rows, seats, geometry).

- Publish the schema so it becomes available for the Renderer/API usage.
Reference: Editor user guide
Step 2. Copy integration credentials from Admin panel
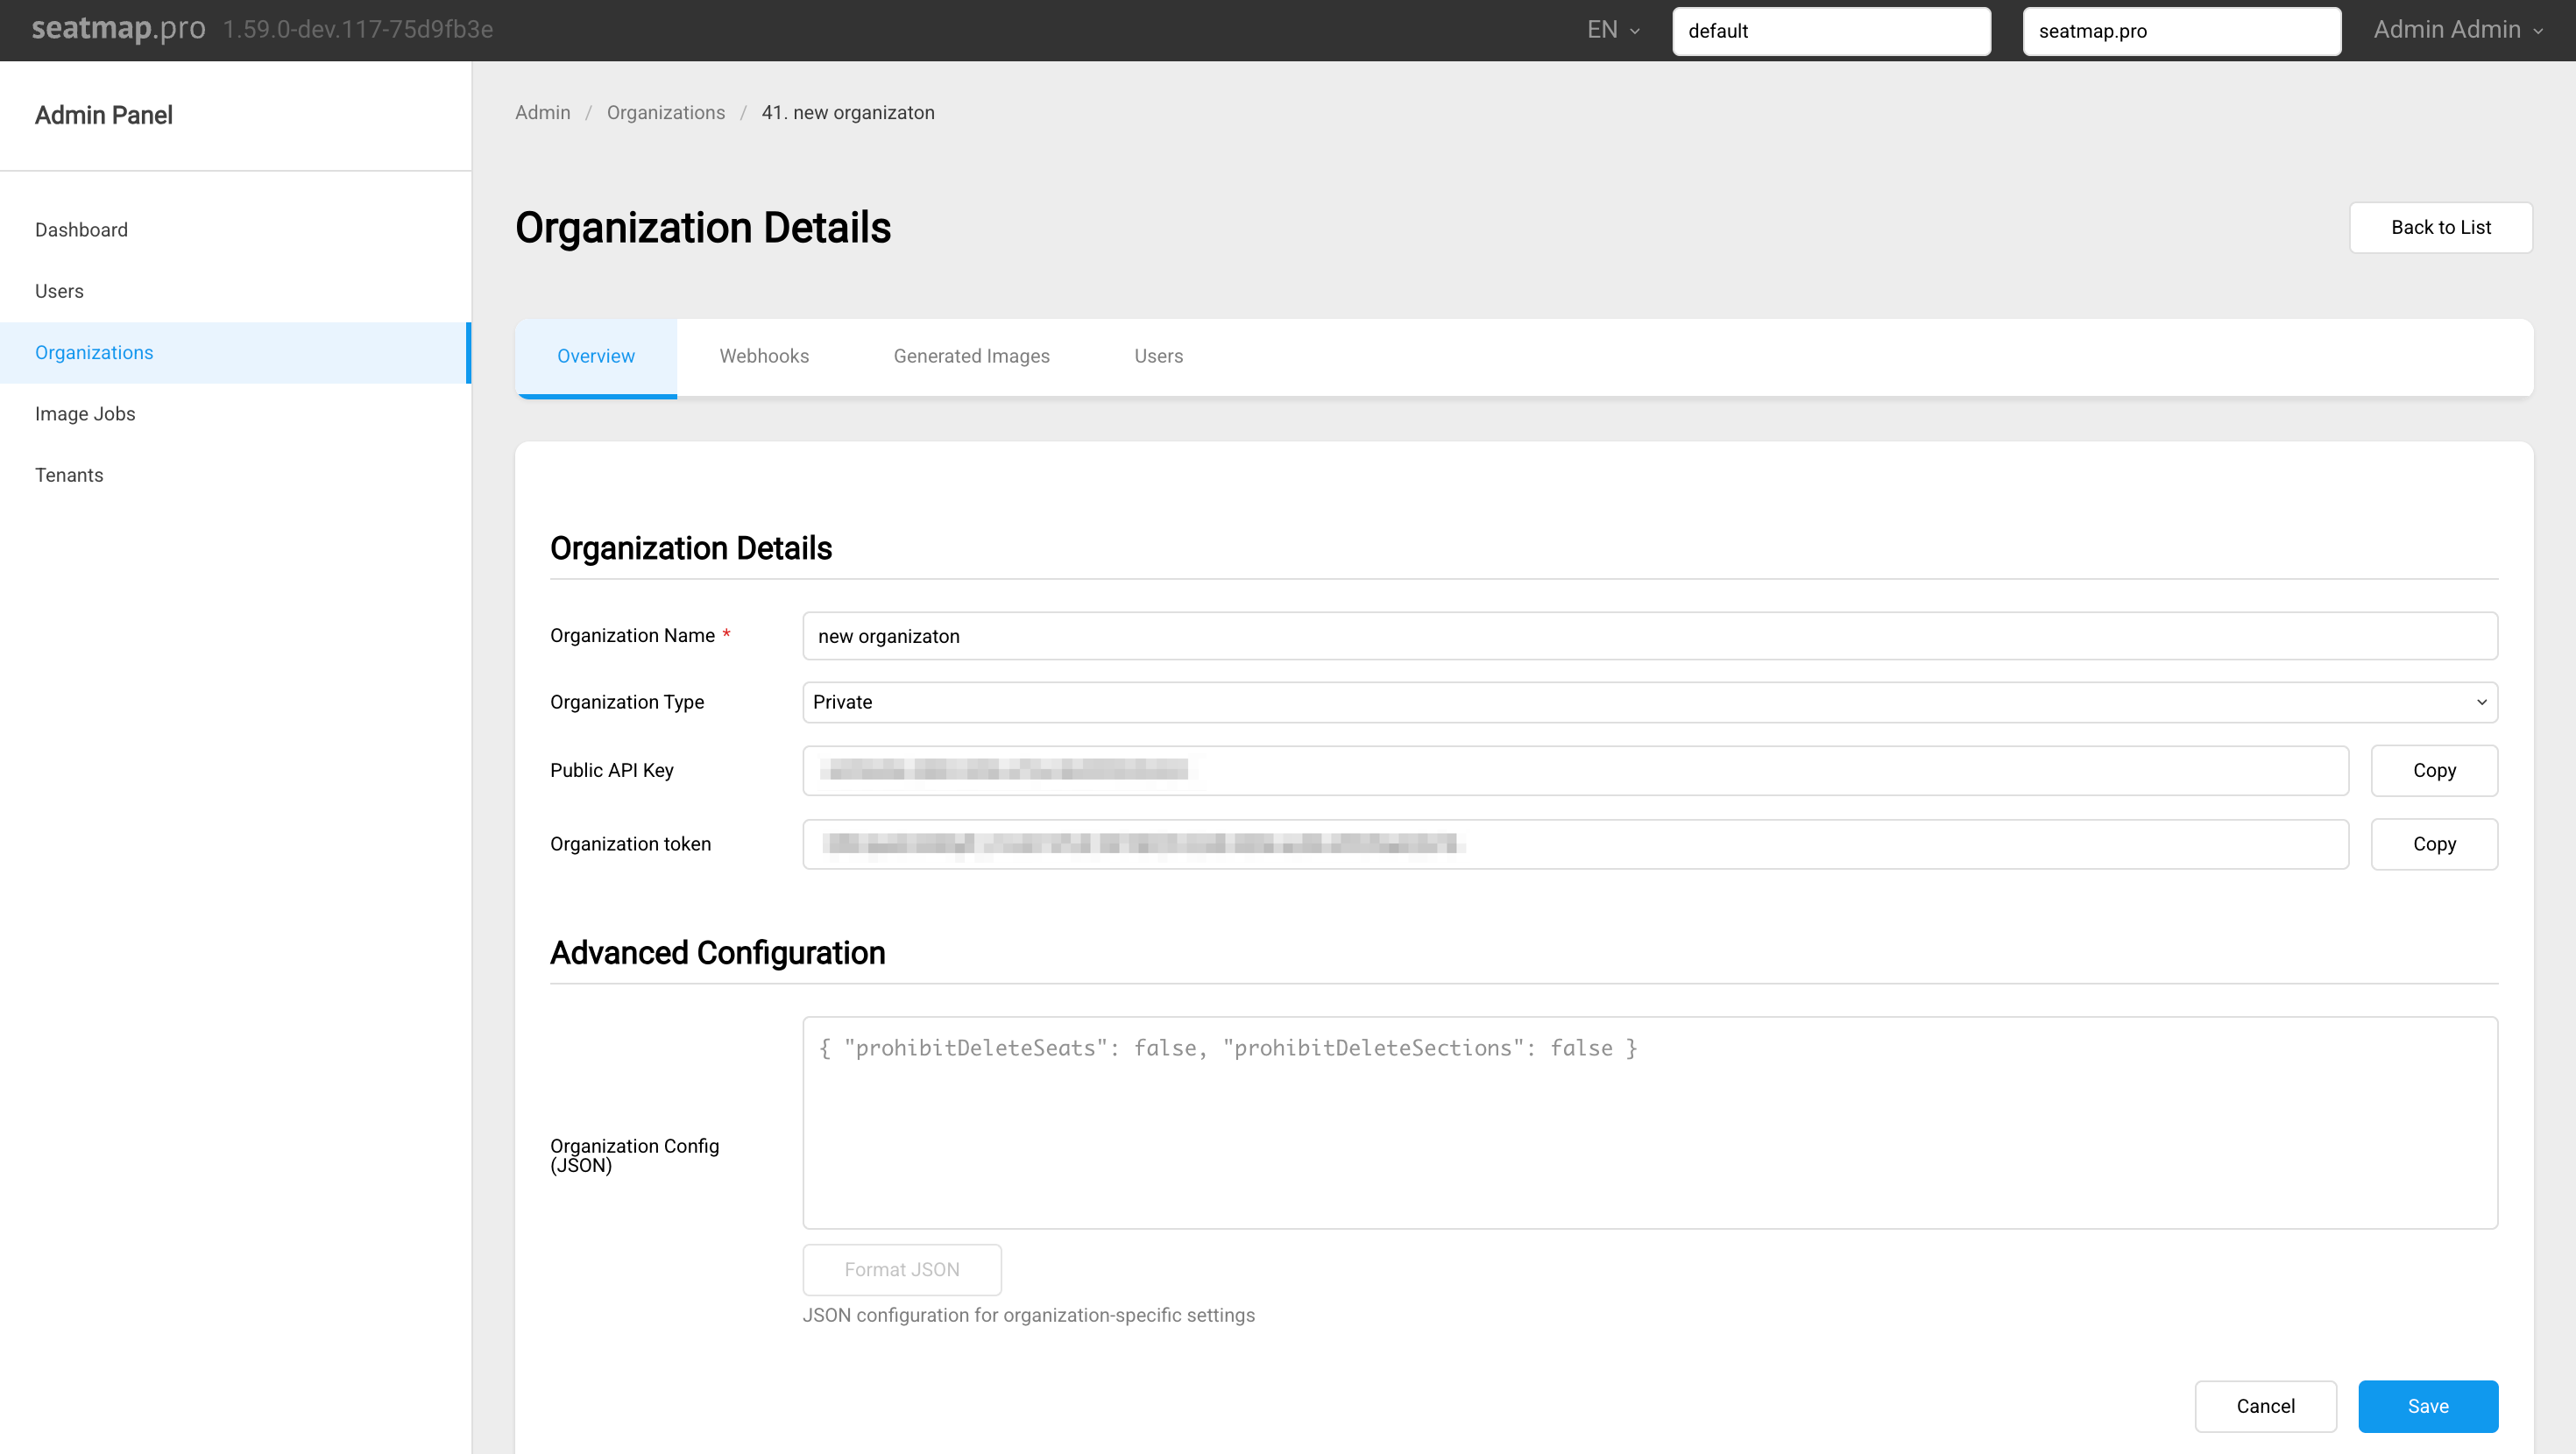
In Editor Admin panel, open organization details and copy:
- Public API Key (used by Booking Renderer on client side)
- Organization token (used as
X-API-Keyin backend API calls)
Reference: Managing access
Step 3. Create event in backend and keep eventId

An event links your published schema to a specific show/date.
Call Booking API from your backend:
curl -X POST "https://booking.seatmap.pro/api/private/v2.0/events/" \
  -H "Content-Type: application/json" \
  -H "X-API-Key: <ORGANIZATION_TOKEN>" \
  -H "X-Organization-ID: <ORGANIZATION_ID>" \
  -d '{
    "id": null,
    "createdDate": null,
    "start": "2025-12-03T20:00:00Z",
    "endDate": "2025-12-03T22:30:00Z",
    "name": "My Concert - Dec 03 2025",
    "schemaId": 3275
  }'
Then:
- store returned
eventIdin your event record - return this
eventIdto your selling page
This is the critical bridge between your ticketing domain and Renderer initialization.
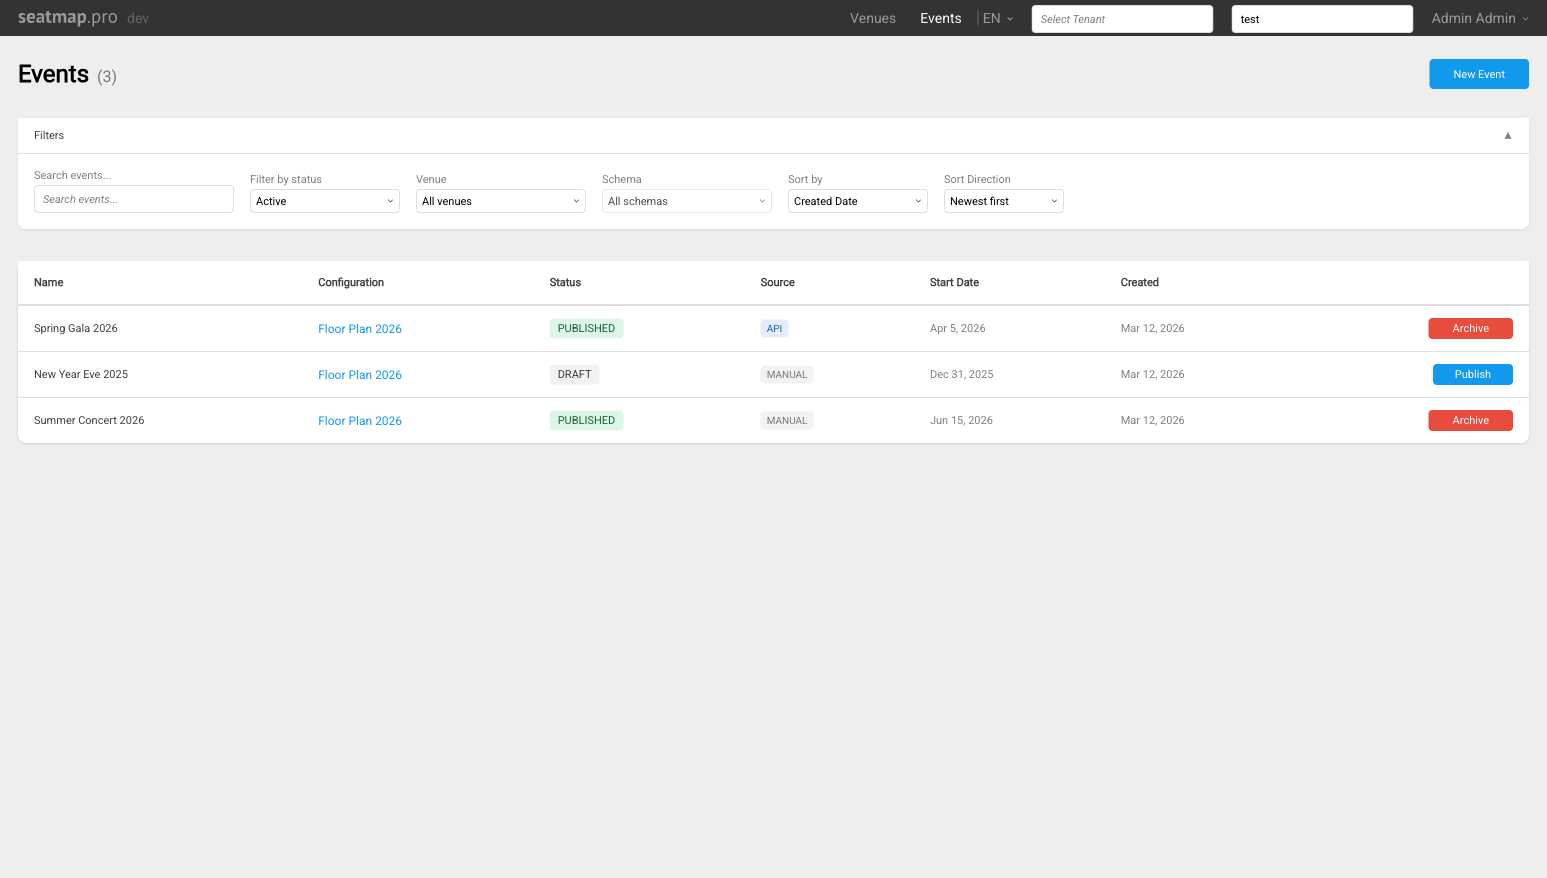
You can also create an event using Editor UI by clicking the Events tab and creating a new event from there. For more information on managing events via UI read this section.
Step 4. Create and assign prices (backend)

Create prices for the event:
curl -X POST "https://booking.seatmap.pro/api/private/v2.0/event/<EVENT_ID>/prices/" \
  -H "Content-Type: application/json" \
  -H "X-API-Key: <ORGANIZATION_TOKEN>" \
  -H "X-Organization-ID: <ORGANIZATION_ID>" \
  -d '[
    {
      "id": null,
      "name": "2000",
      "eventId": "<EVENT_ID>",
      "externalId": null
    }
  ]'
Assign created price to seats:
curl -X POST "https://booking.seatmap.pro/api/private/v2.0/event/<EVENT_ID>/prices/assignments/" \
  -H "Content-Type: application/json" \
  -H "X-API-Key: <ORGANIZATION_TOKEN>" \
  -H "X-Organization-ID: <ORGANIZATION_ID>" \
  -d '{
    "seats": [
      {
        "objectId": 5142395,
        "assignmentId": 3618500,
        "activeCount": null
      }
    ]
  }'
objectId is a seat object ID from schema metadata, and assignmentId is the created price assignment ID.
Composite keys
To address seat attributes (price, lock, sale state), Seatmap Pro uses natural-language composite keys.
Example:
- Seat
Section B,Row 5,Seat 14->Section B;;5;;14
Use composite keys as the main addressing option for seat-level operations.
General admission: Seats shall be addressed by the section name.
To retrieve composite keys for a schema, use the corresponding getMeta method from the Venues/API section.
Optional: you can manage prices directly in Editor pricing mode instead of assigning them through backend API.
Step 5. Initialize Booking Renderer via SDK

Install the package (choose one):
npm install @seatmap.pro/renderer
yarn add @seatmap.pro/renderer
pnpm add @seatmap.pro/renderer
SDK reference: Initializing SDK
Add a Renderer container to your selling page template:
<div id="seatmap-root" style="width: 100%; height: 600px;"></div>
Then initialize the Renderer in your app code, for instance:
import { SeatmapBookingRenderer } from '@seatmap.pro/renderer';

type SeatmapConfig = {
  eventId: string;
  publicKey: string;
};

async function initSeatmap(container: HTMLElement, cfg: SeatmapConfig) {
  const renderer = new SeatmapBookingRenderer(container, {
    publicKey: cfg.publicKey,
    onSeatSelect: (seat) => {
      console.log('select', seat);
      // sync selection with your cart/back-end
    },
    onSeatDeselect: (seat) => {
      console.log('deselect', seat);
      // sync deselection with your cart/back-end
    },
  });

  await renderer.loadEvent(cfg.eventId);
  return renderer;
}
Required runtime values:
publicKey: from organization settings in Editor Admin panel.eventId: created and stored by your backend for a specific show.
Step 6. Handle operations with seats
The Renderer exposes callbacks for seat and interaction events, including:
- seat selection
- seat deselection
- hover and blur interactions
For getting started, the main integration point is onSeatSelect.
After the callback is triggered, you typically choose one of these approaches:
- Keep selection only in a local cart and sync with backend later (for example, on checkout).
- Lock or unlock seats on each select/deselect event (lock-per-click flow).
For production ticketing, lock-per-click is usually the safer approach.
Lock-per-click flow:
- User selects a seat on the selling page.
- Renderer triggers callback and notifies your sales page code.
- Sales page sends a lock request to your ticketing backend.
- Backend performs internal state checks and validates that lock is allowed.
- Backend calls Booking API to lock the seat.

Step 7. Test integration
You are ready for production integration when:
- schema is published and visible in Editor
- public API key and organization token are copied from organization settings
- backend can provide valid
eventIdfor a show - backend can create prices and assign them to seat objects
- selling page renders the chart and seat interactions work
- checkout flow updates seat state correctly
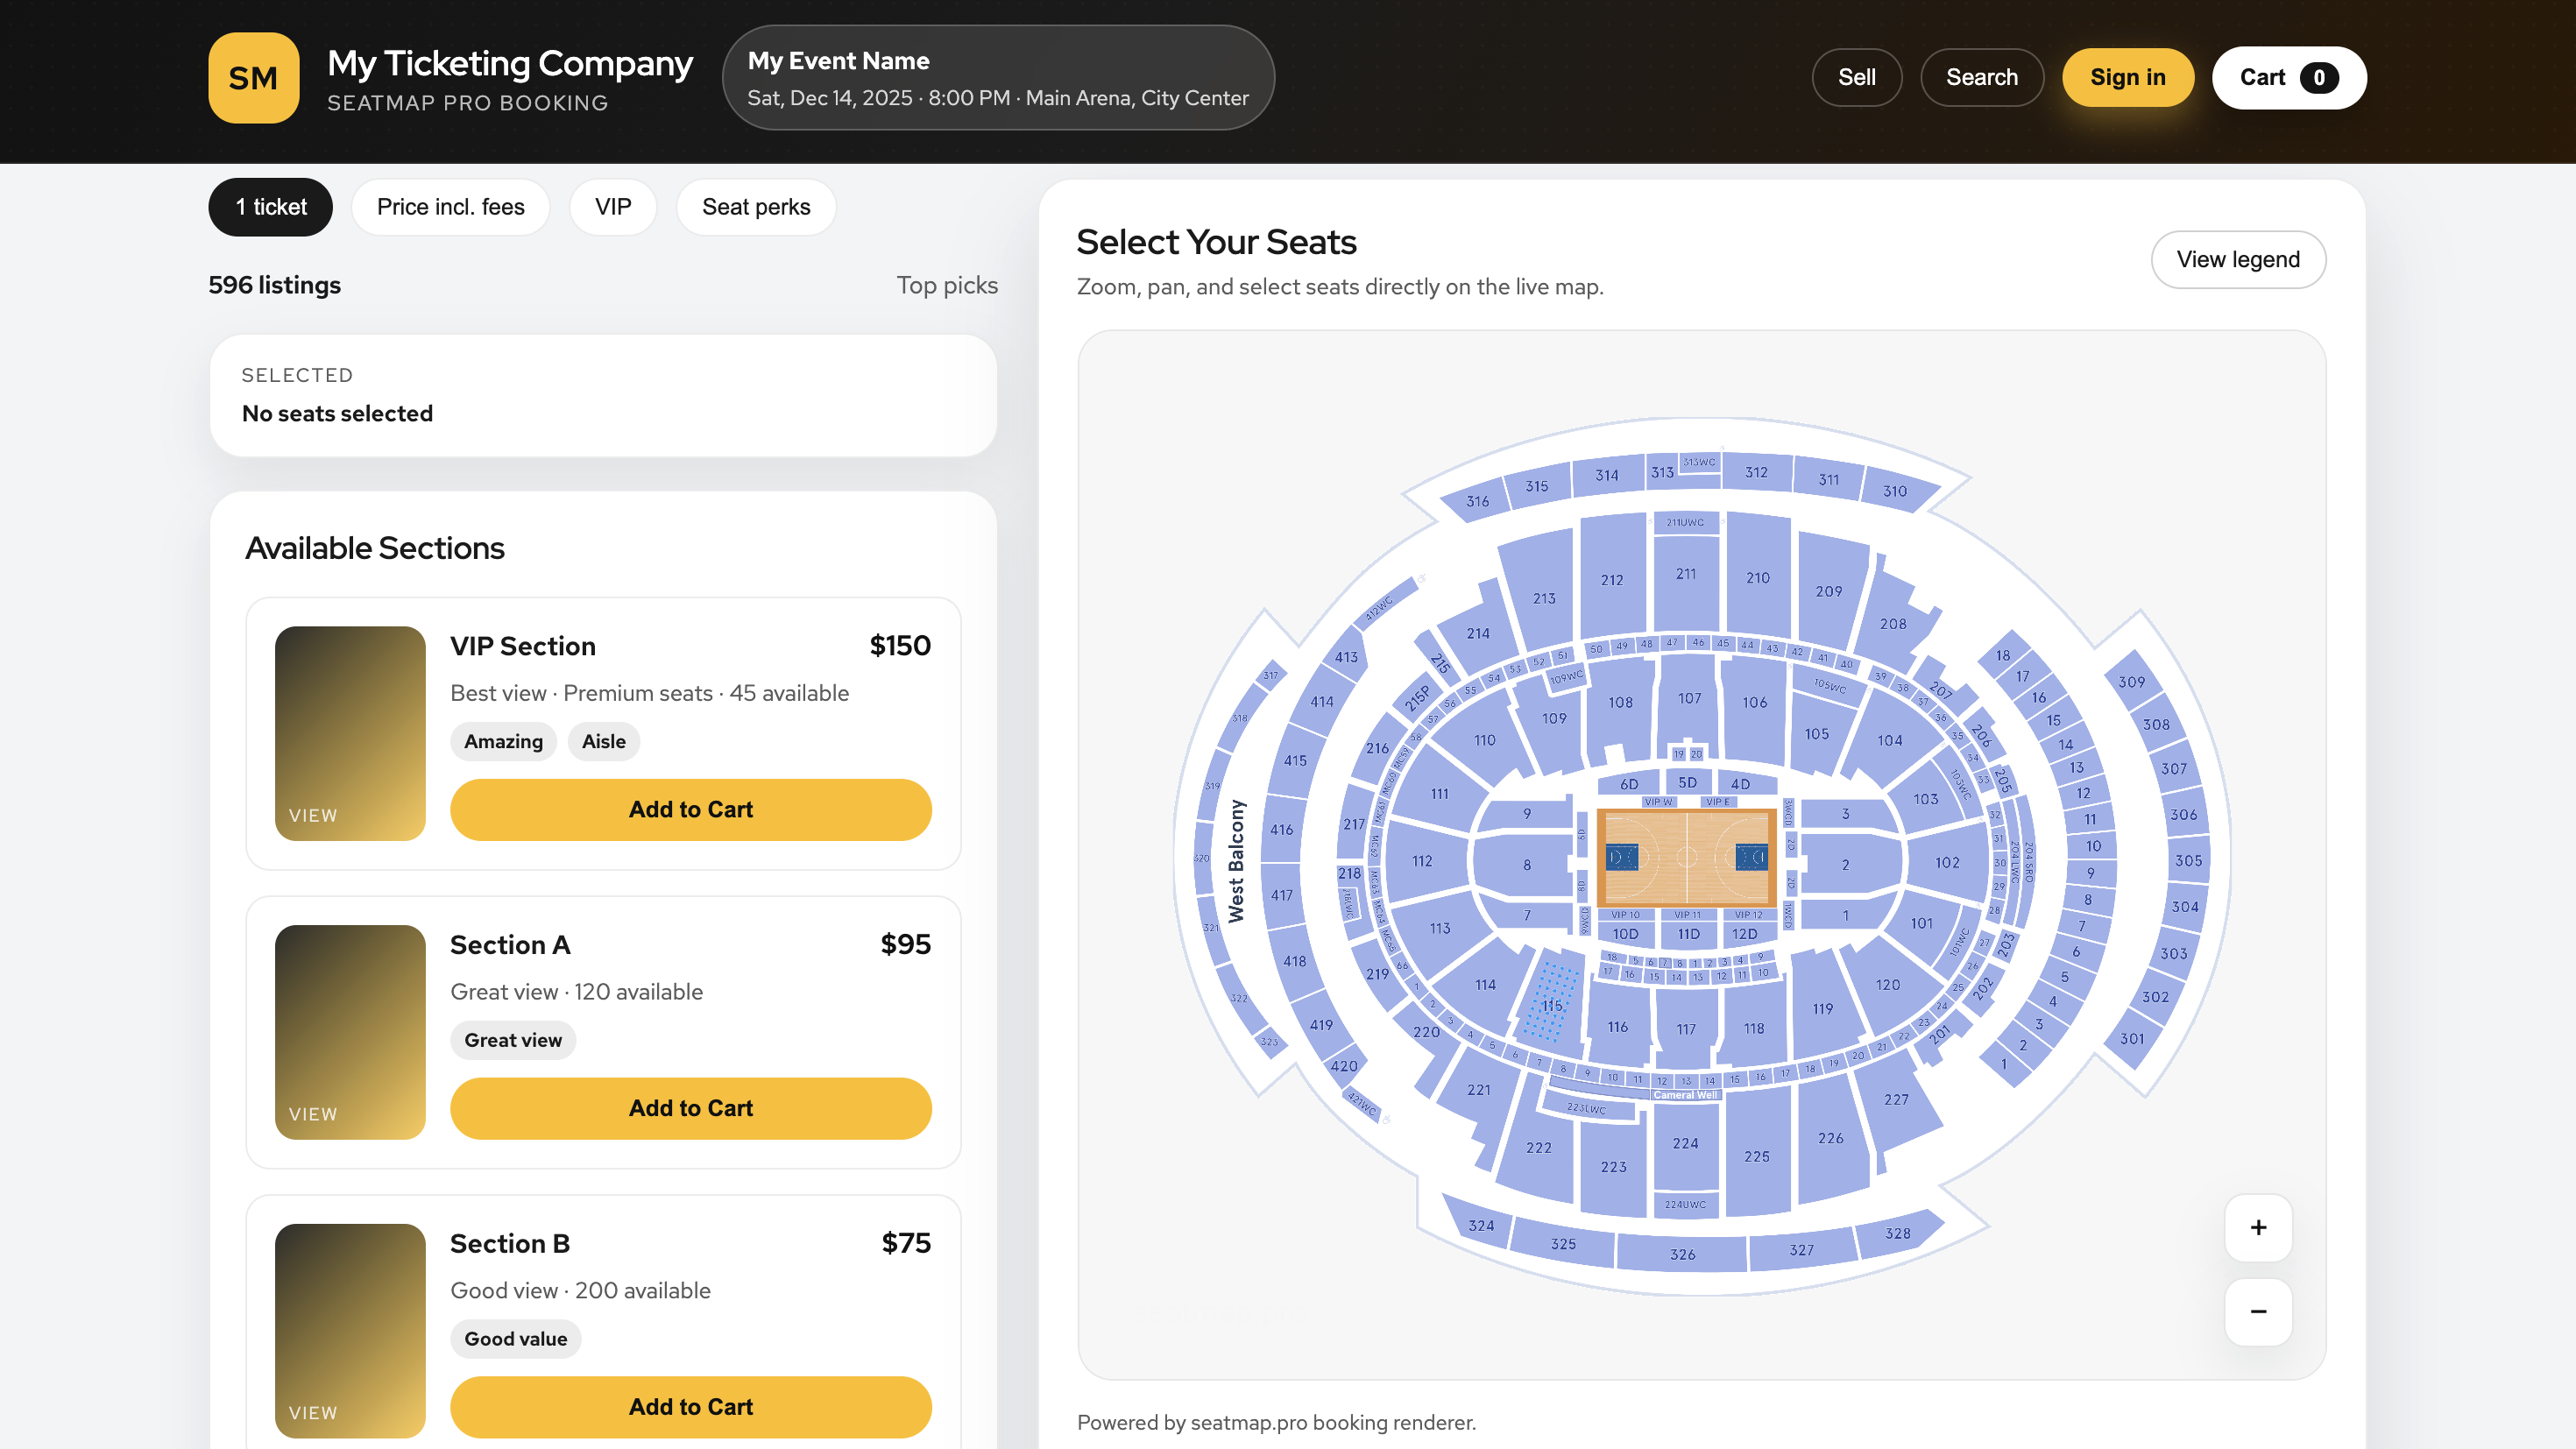
If you want a ready HTML/CSS/JS example, see:
Example of the final Renderer placement on a selling page:
Further reading
- Visual Workshop: How to Build Beautiful Maps – a walkthrough of designing a realistic arena layout in the Editor
- Step-by-step guide to starting your venue chart – from signup to a live seating plan
- Why API integration is crucial for ticketing platforms – how the Booking API fits into a production ticketing workflow