November–January Product Recap (v1.54–1.58)
This release cycle combines several closely related updates to Seatmap Pro, focused on three areas: stronger administration tools in the Editor, a more
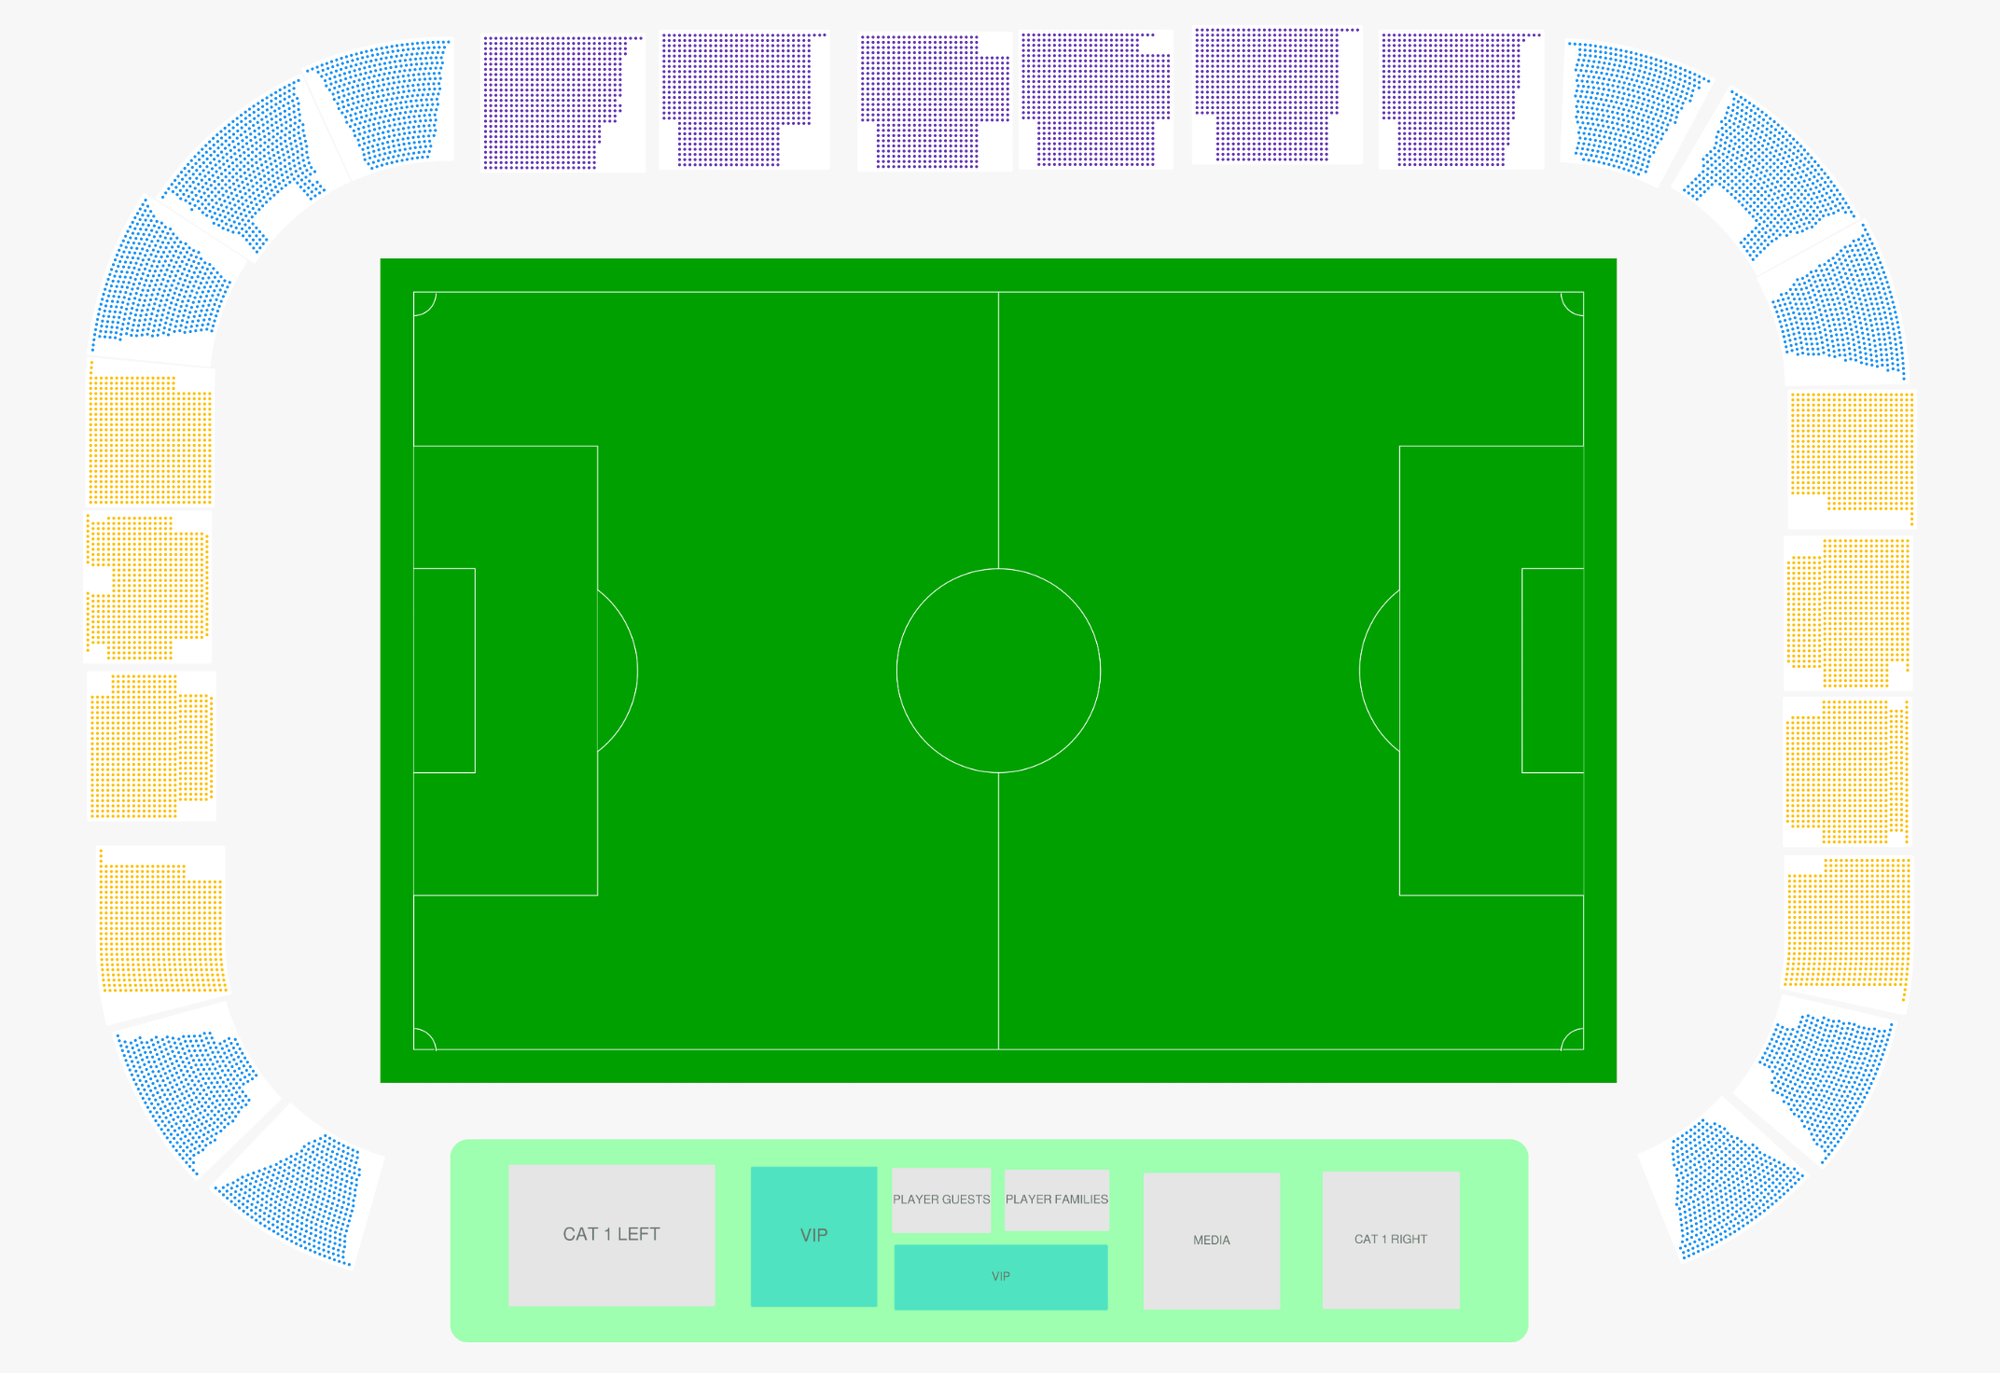
Today we’re going to build a complete, production-ready multi-tier arena map in Seatmap Pro – the kind you’d actually sell tickets from.
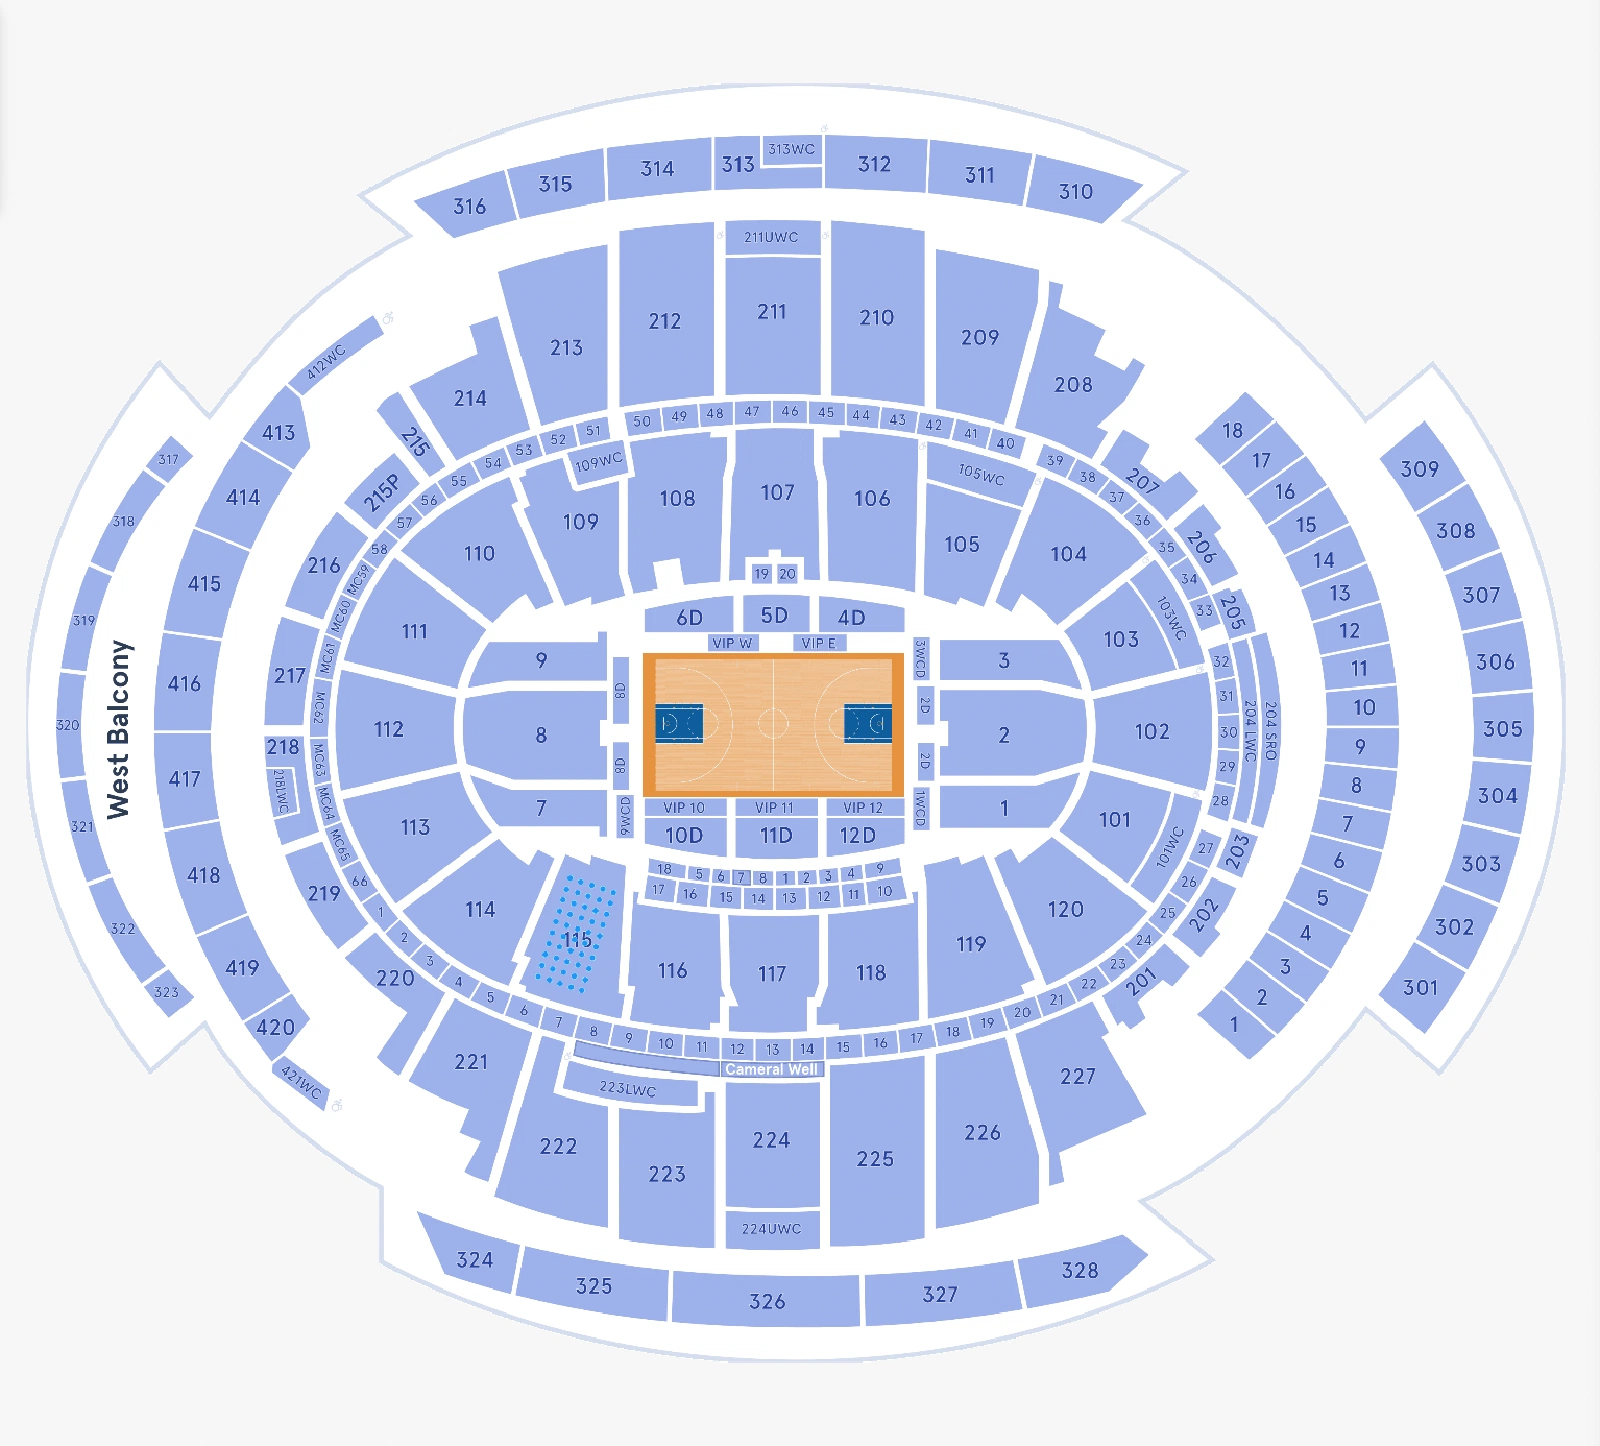
Welcome to the workshop. Today we’re going to build a complete, production-ready multi-tier arena map in Seatmap Pro – the kind you’d actually sell tickets from. We’ll use the Al-Maktoum stadium as our real example: central rink, curved sections, corner transitions, and some box/suite areas.
The most important mindset shift before we start: Seatmap Pro is not a graphical design tool. It’s a ticketing-first geometry engine. The seats, rows and sections you create are the source of truth for pricing, selection, availability – everything that matters to revenue. The visual polish comes second and should never compromise the logical structure.
Many teams make the mistake of trying to make it look perfect from day one. That almost always leads to headaches later: drifting on zoom, sections disappearing, weird mobile behavior. So our golden rule today is:**** first create clean, logical, symmetrical schema geometry. Only then dress it up visually.
We’ll cover two realistic workflows : one fast and functional – good enough for production ticketing quickly, and one polished and beautiful – when the client wants a stunning visual presentation.
Both start the same way: schema first.
1. Creating Sections – Two Quick Ways
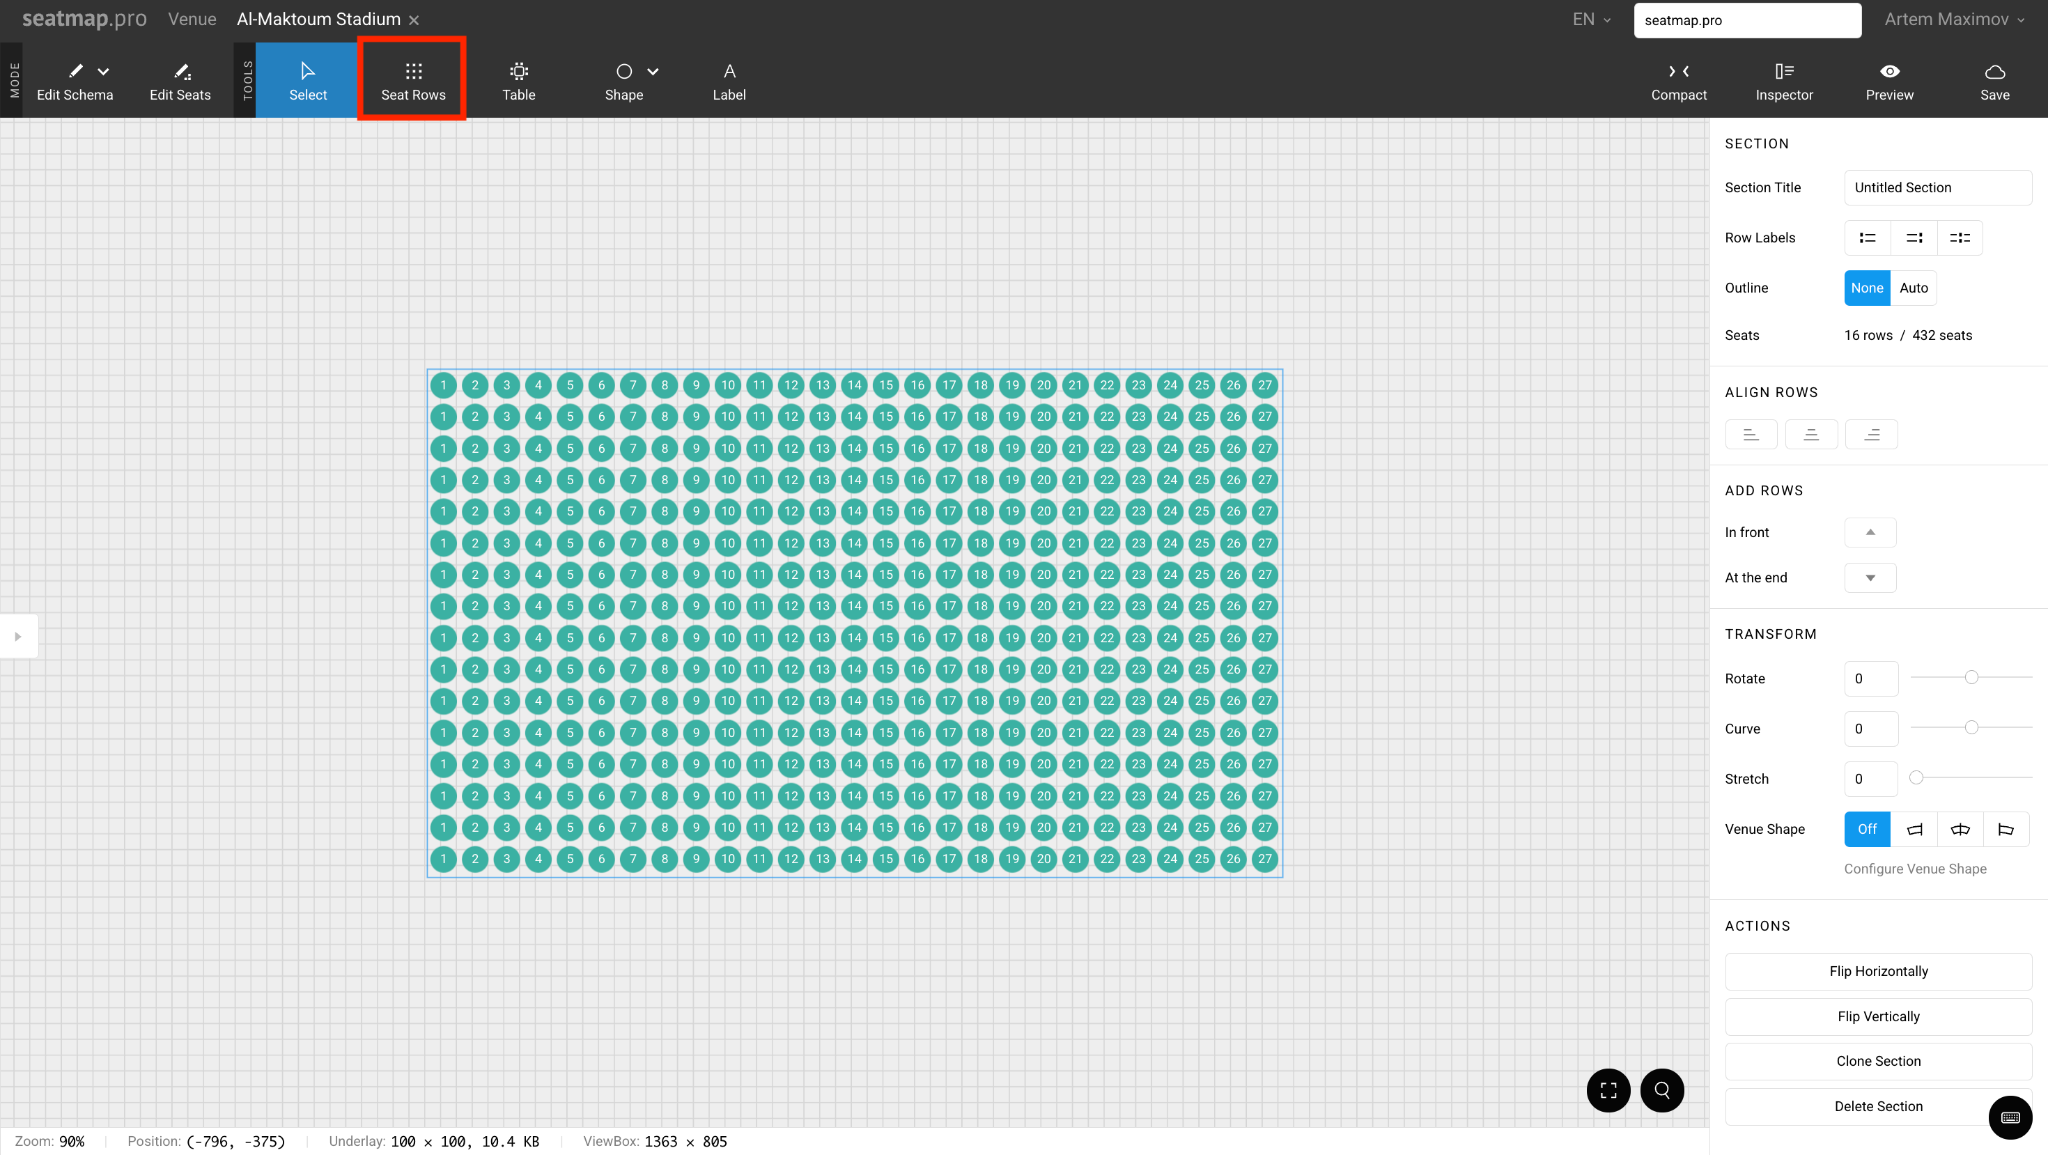
Switch to Edit Schema mode (you’ll see the pencil icon in the top bar).
In the TOOLS menu → click the Seat Rows icon (looks like rows of circles). Hold left mouse and drag a rectangle on the canvas → live preview shows row/seat count → release to create the section instantly.
Select an existing section → right sidebar shows SECTION controls. Or use hotkeys: e.g. Cmd + Opt + N for rows on Mac, then drag.
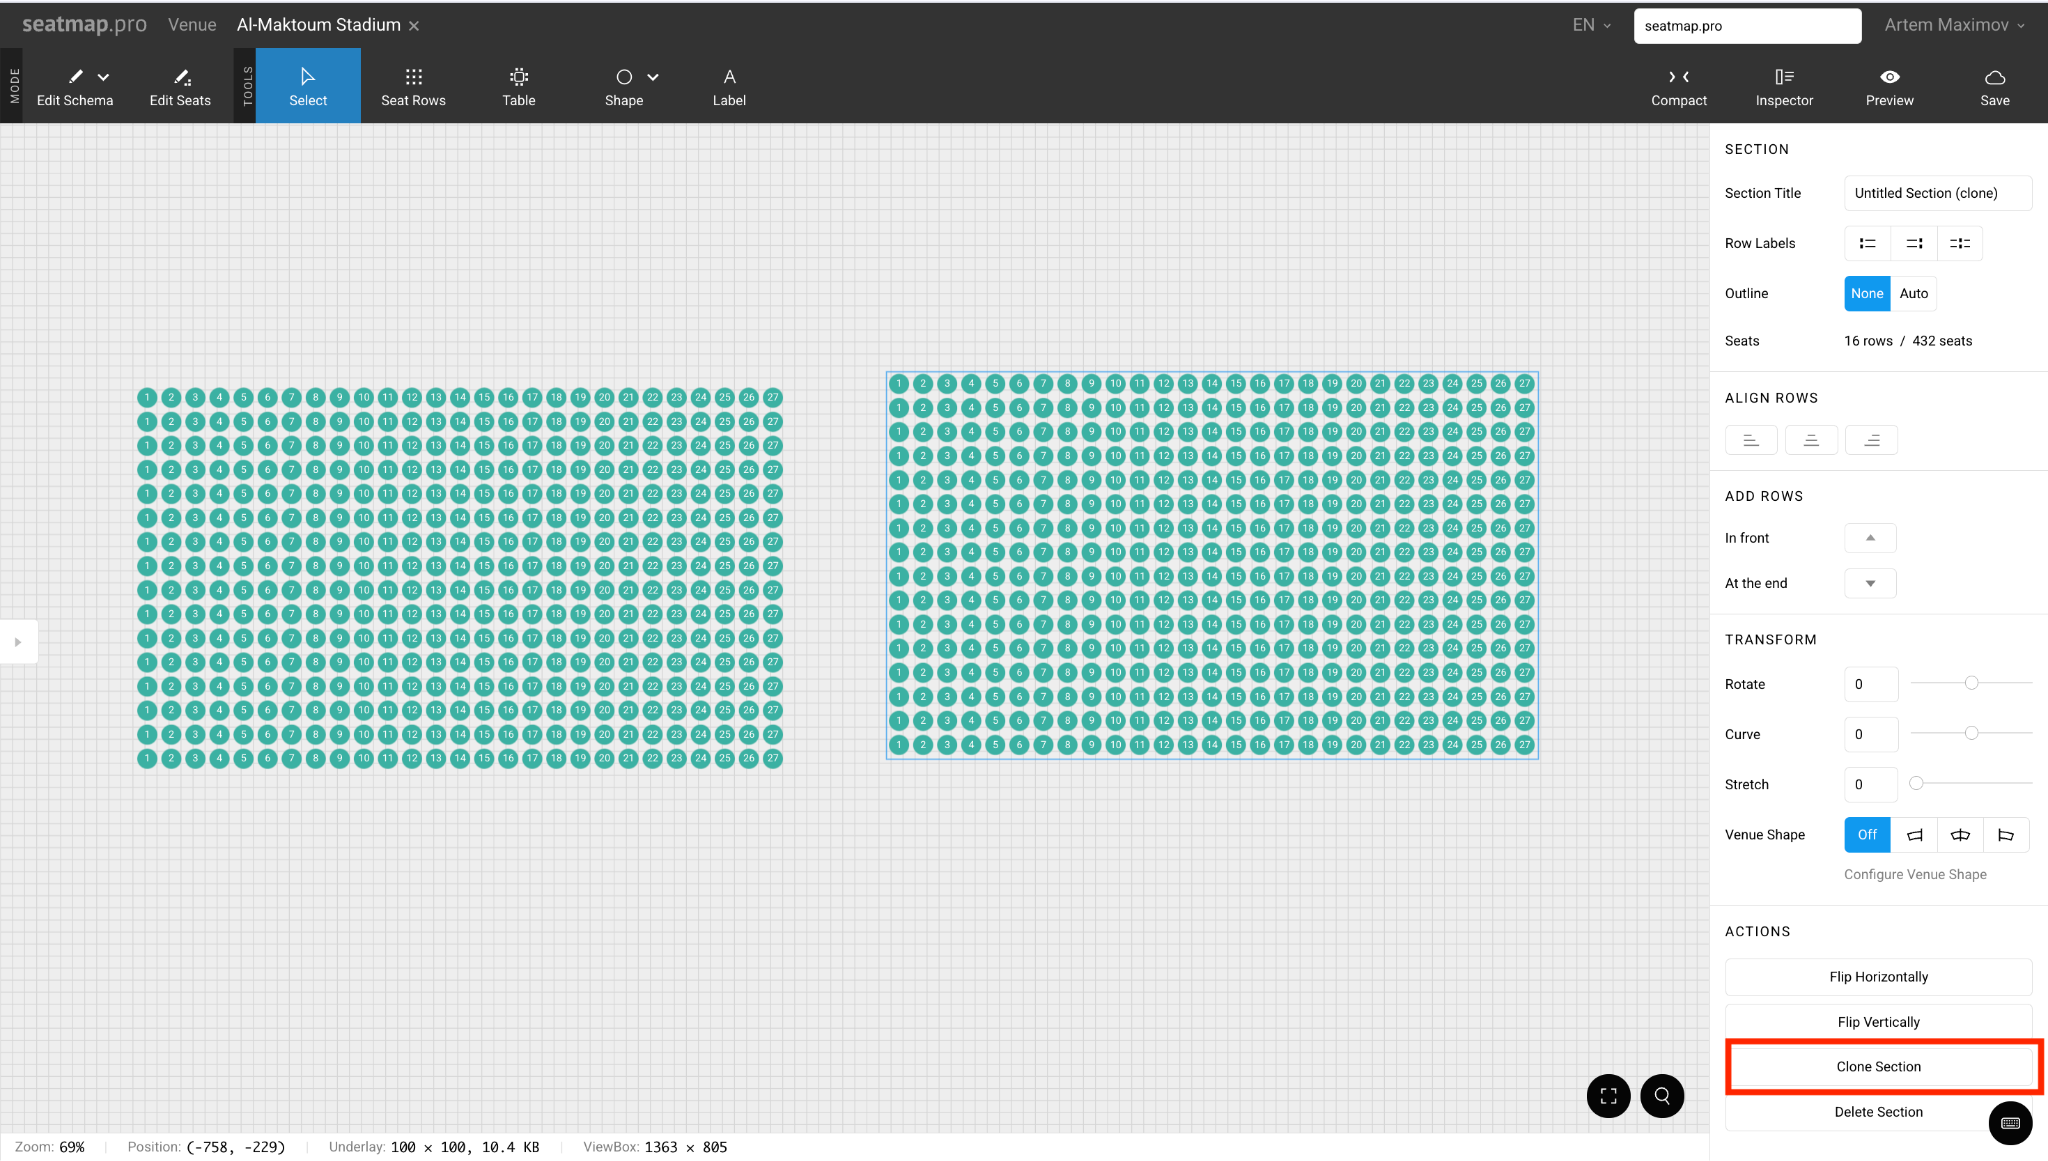
2. Cloning sections
Once you have one good section, choose Clone Section from the actions list. This is how you build dozens of sections fast.
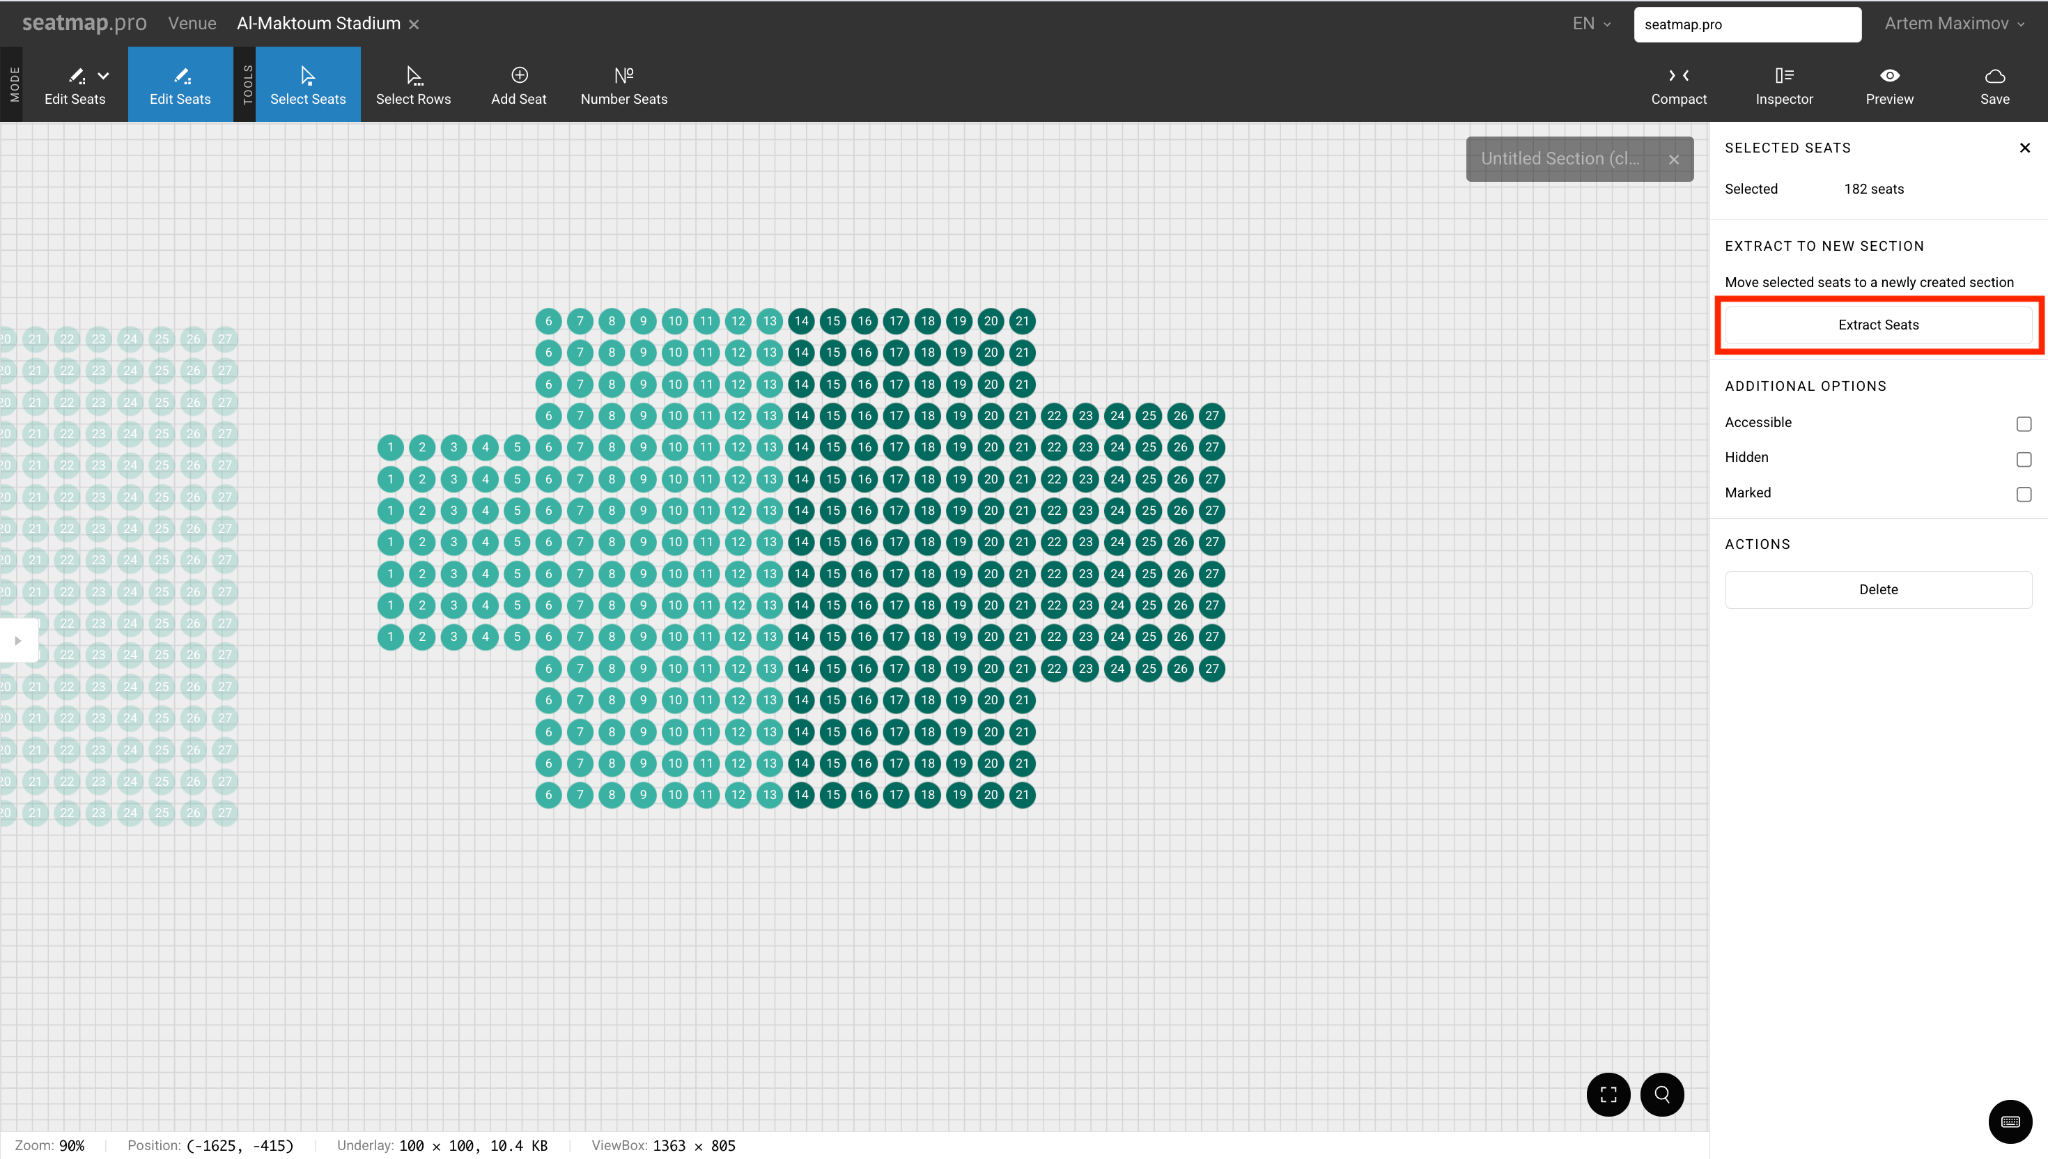
3. Splitting, Cropping & Cleaning Up Sections
Created a giant block which does not represent the section’s geometry? No problem.
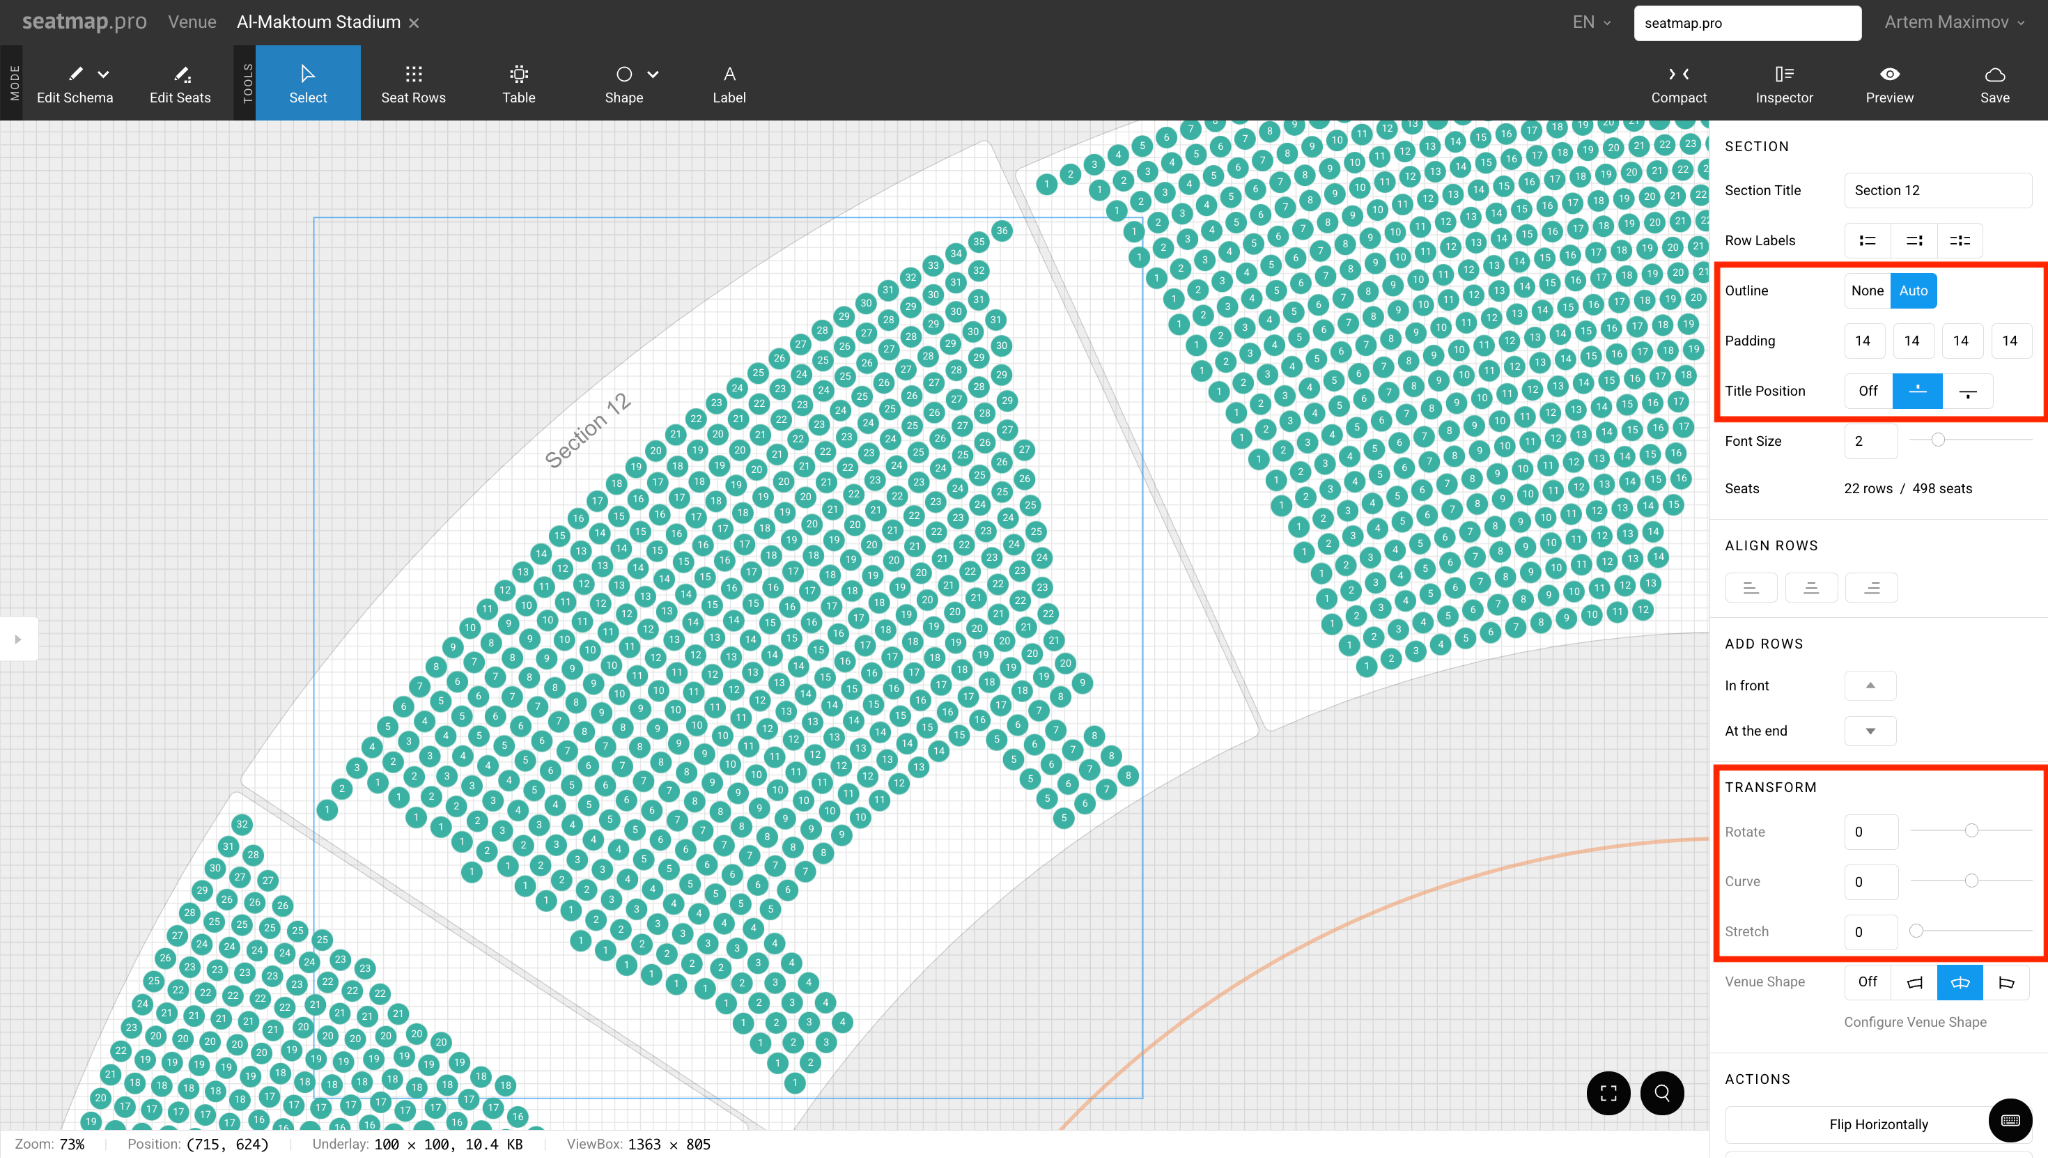
4. Outlines & Readability (80% of visual clarity comes from here)
Return to Edit Schema mode and click on the section again.
With outlines + titles on, the map suddenly becomes readable even without underlay.
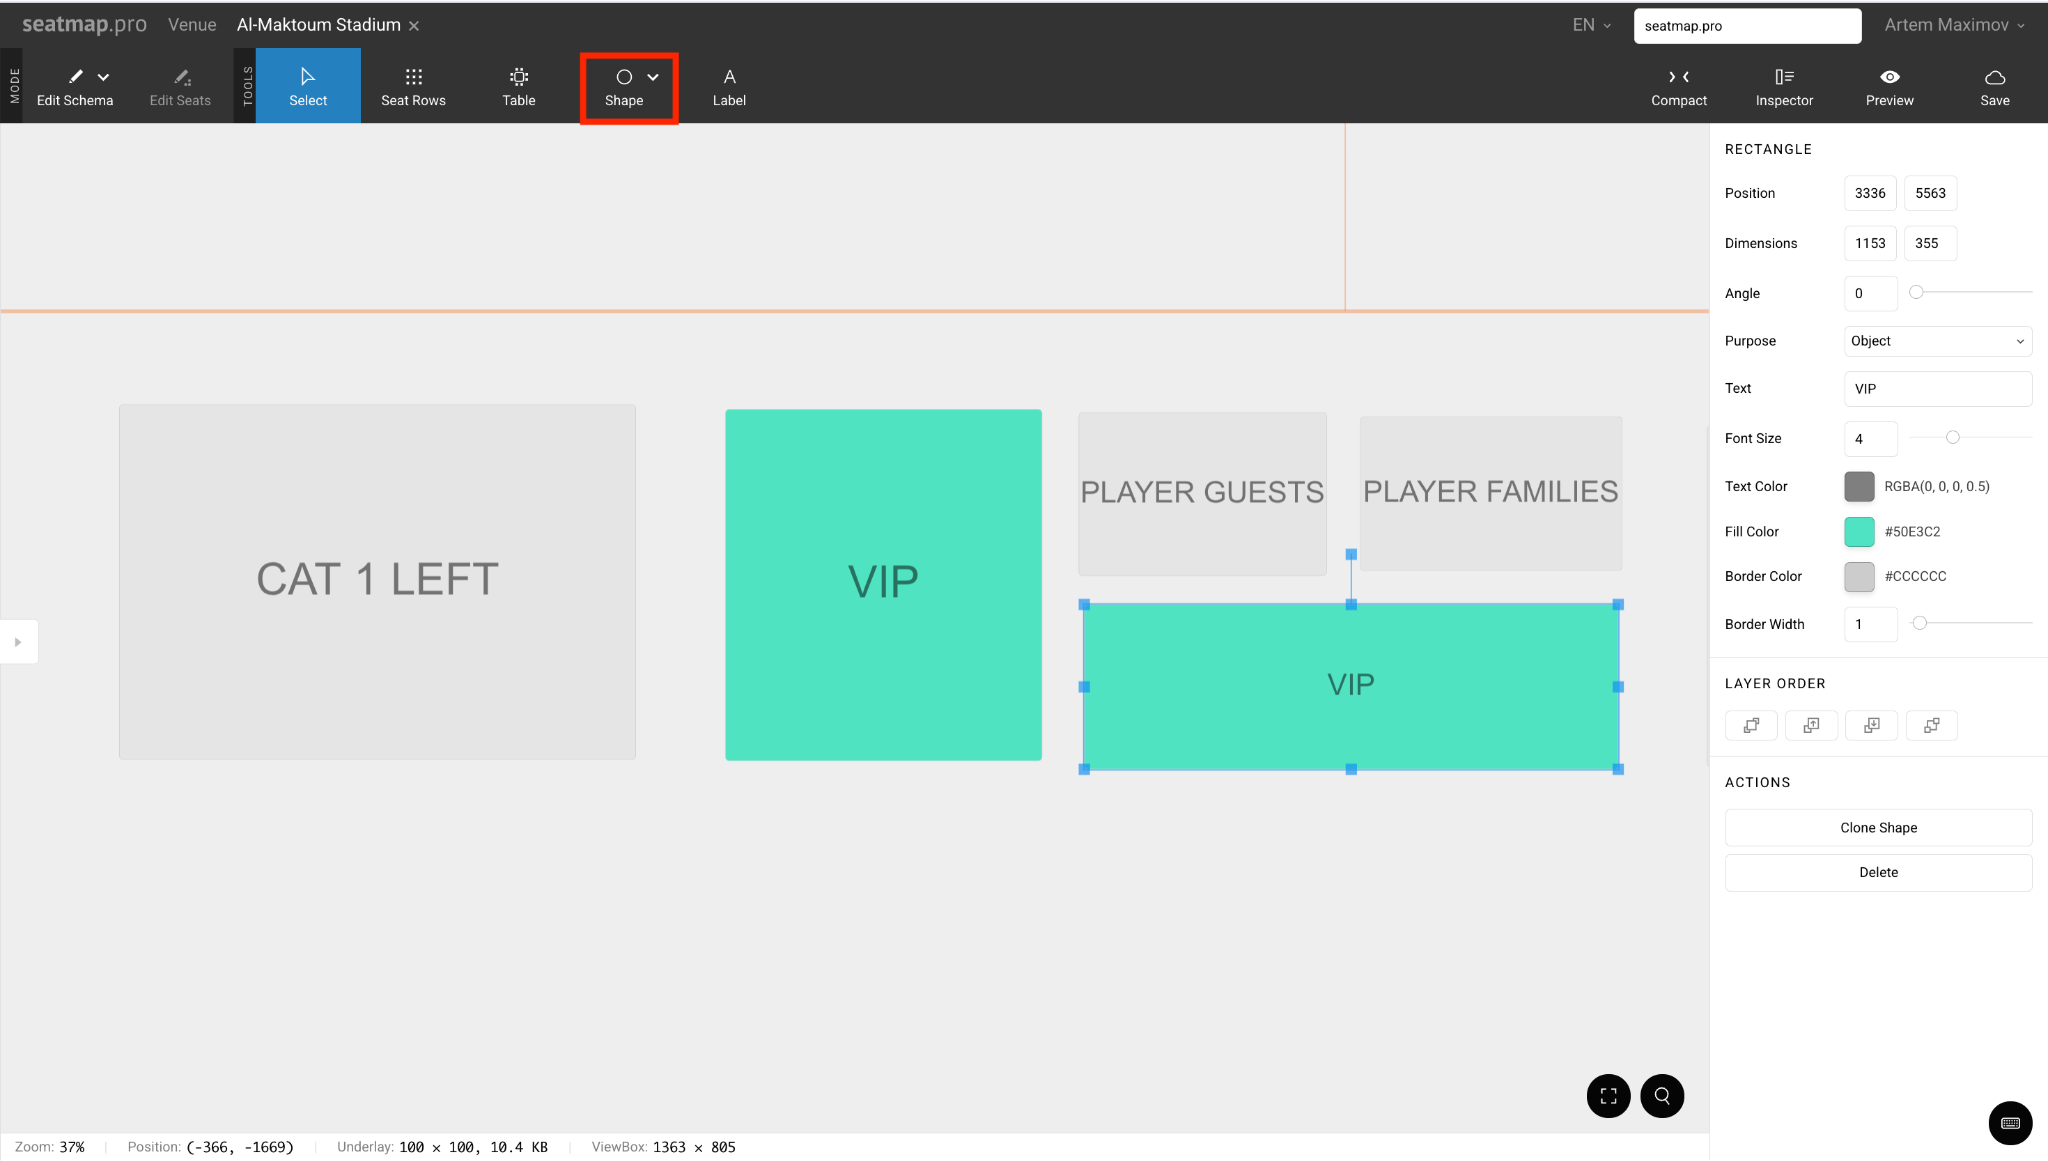
5. Repetition & Basic Shapes for Orientation
Add non-sellable reference objects with Shape tool (circle, rectangle, polygon, line):
6. Defining the overall shape
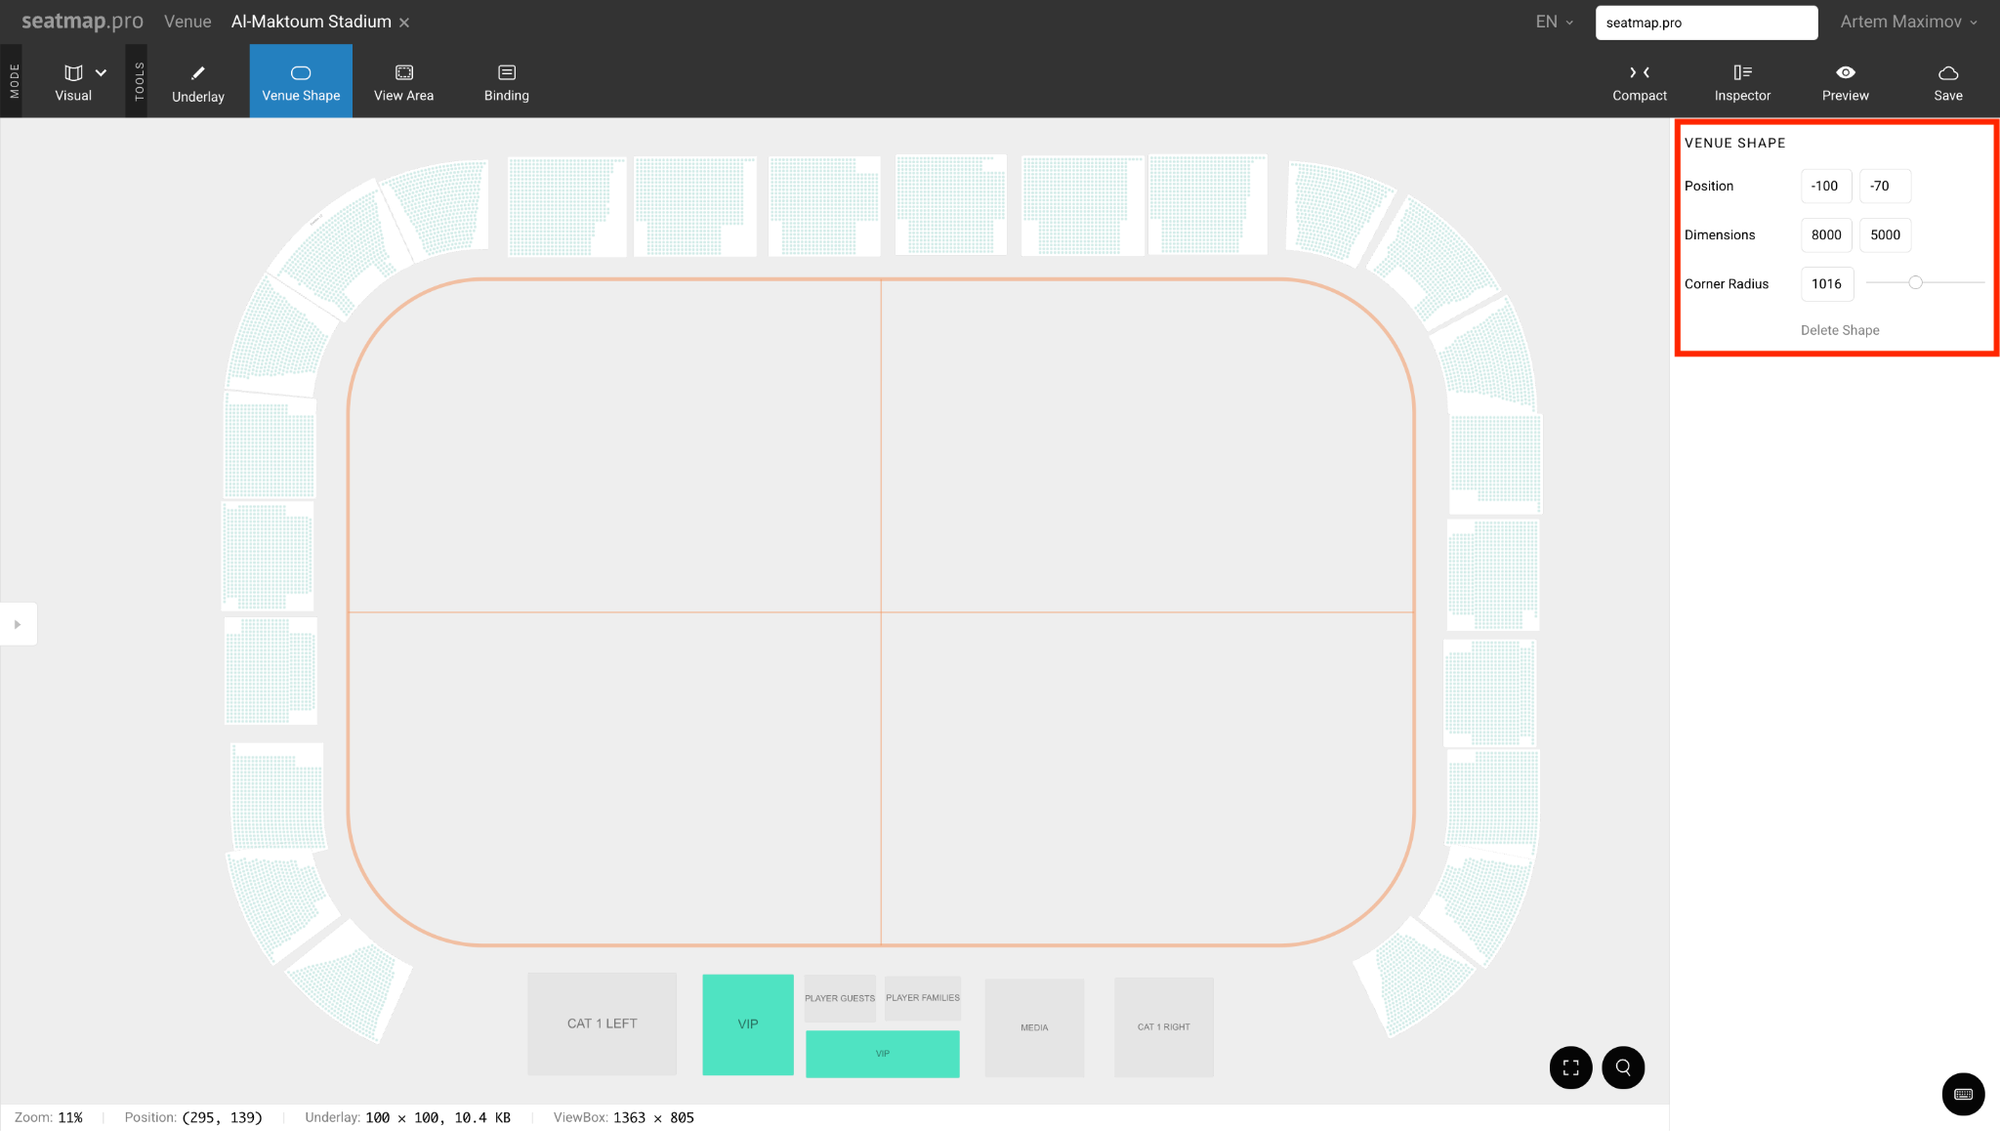
Next big tool: Venue Shape (oval icon in Visual toolbar). This is the single most powerful feature for stadiums and arenas.
In the Venue Shape inspector:
Once the overall venue shape is defined, go back to individual sections and enable Venue Shape linking (the little icon in the transform panel). Suddenly rows start gently following the outer curve. Use Stretch and Curve sliders per section to fine-tune how aggressively the rows bend. This is far cleaner than trying to manually curve every single row.
7. Save & Publish
Hit Save (cloud icon top-right) → then Publish (or Preview first to check zoom/pan). Done. This version is already sellable: clean numbering, logical sections, basic orientation shapes.
Start exactly the same as above: build the fast functional schema with clean sections, titles, clones, and basic shapes.
Then:
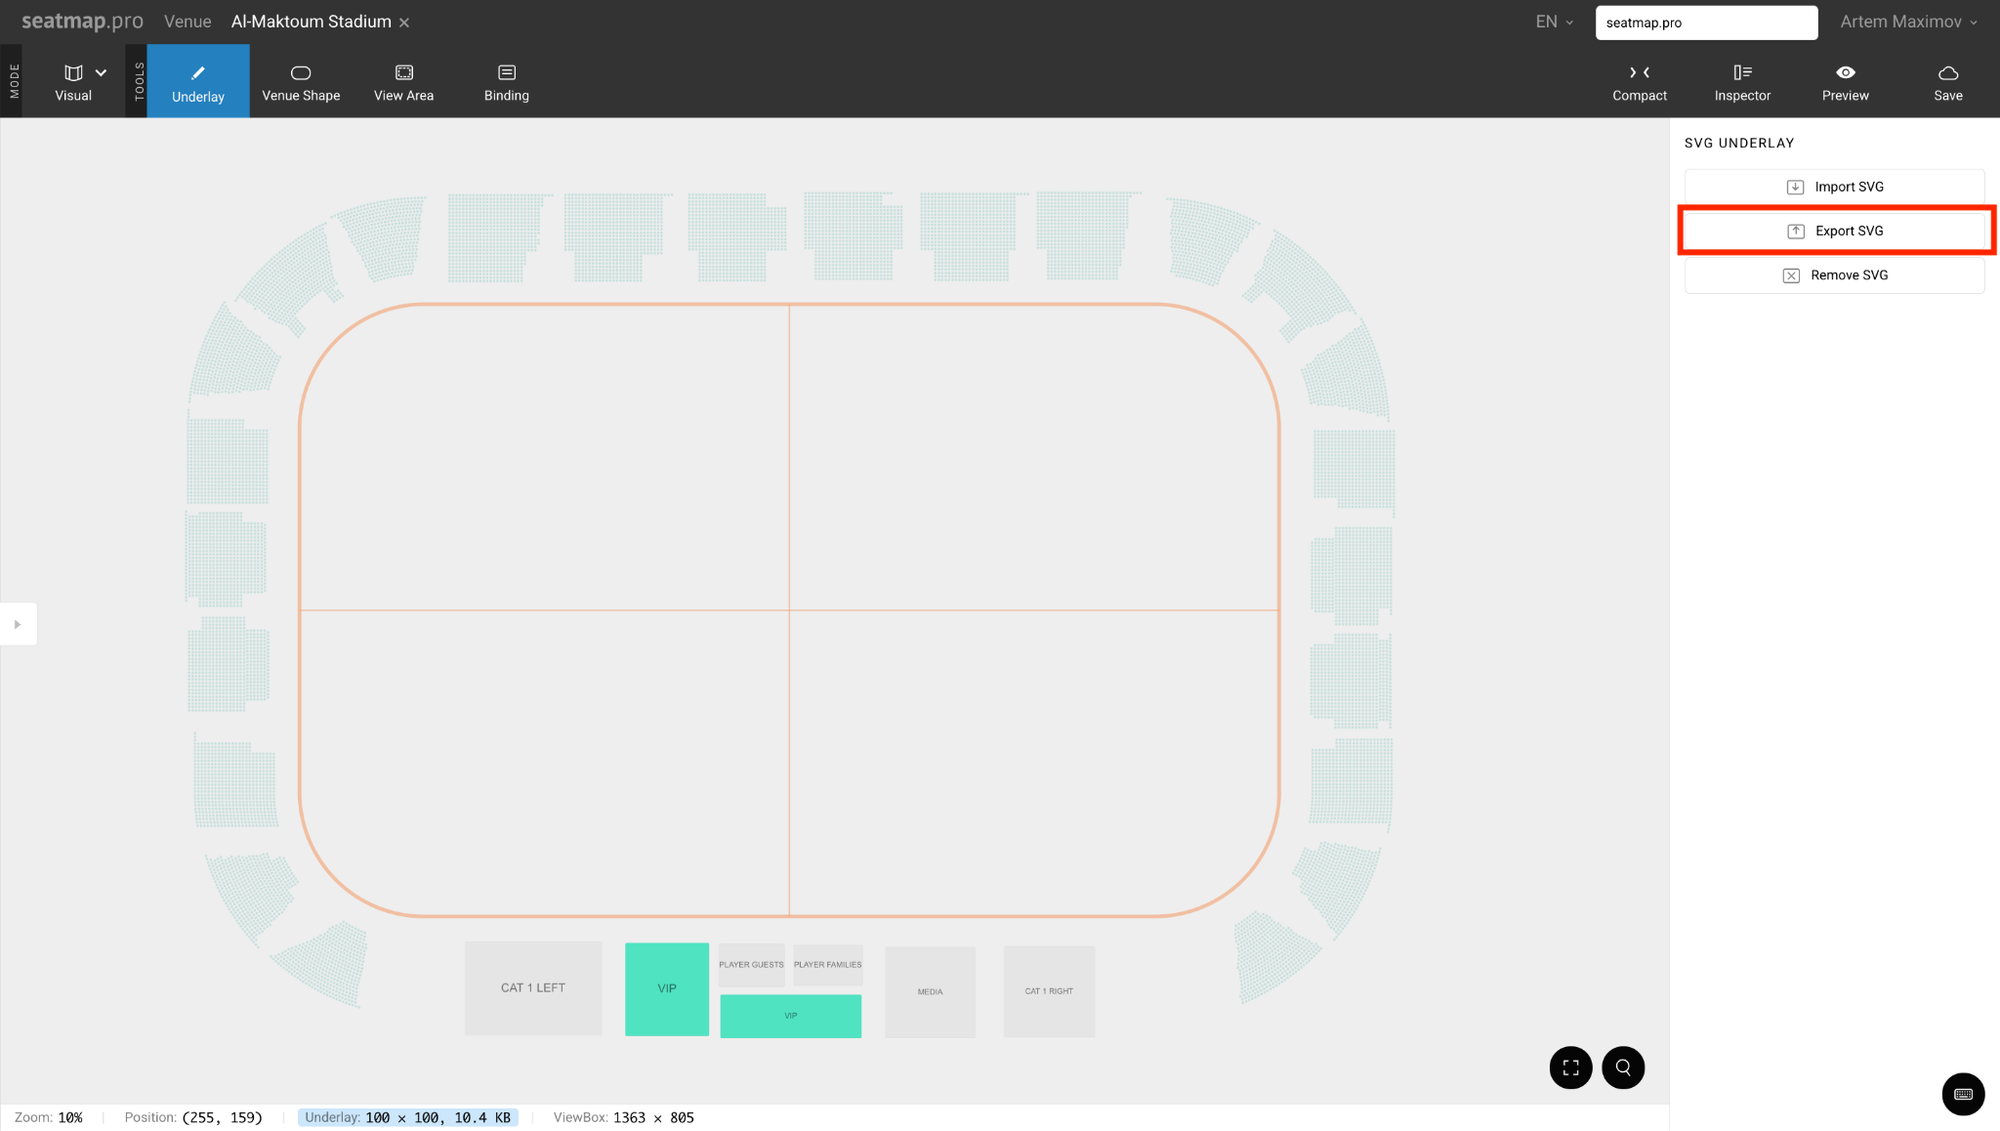
1. Export the Schema as SVG
In the editor → look for Underlay in theVisual tab→ choose Export SVG. This exports your current seating geometry (sections, rows, seats as paths).
2. Refine in Figma / Illustrator
Open the exported SVG in your design tool.
Export the finished design as SVG again (keep the seating layer separate if possible).
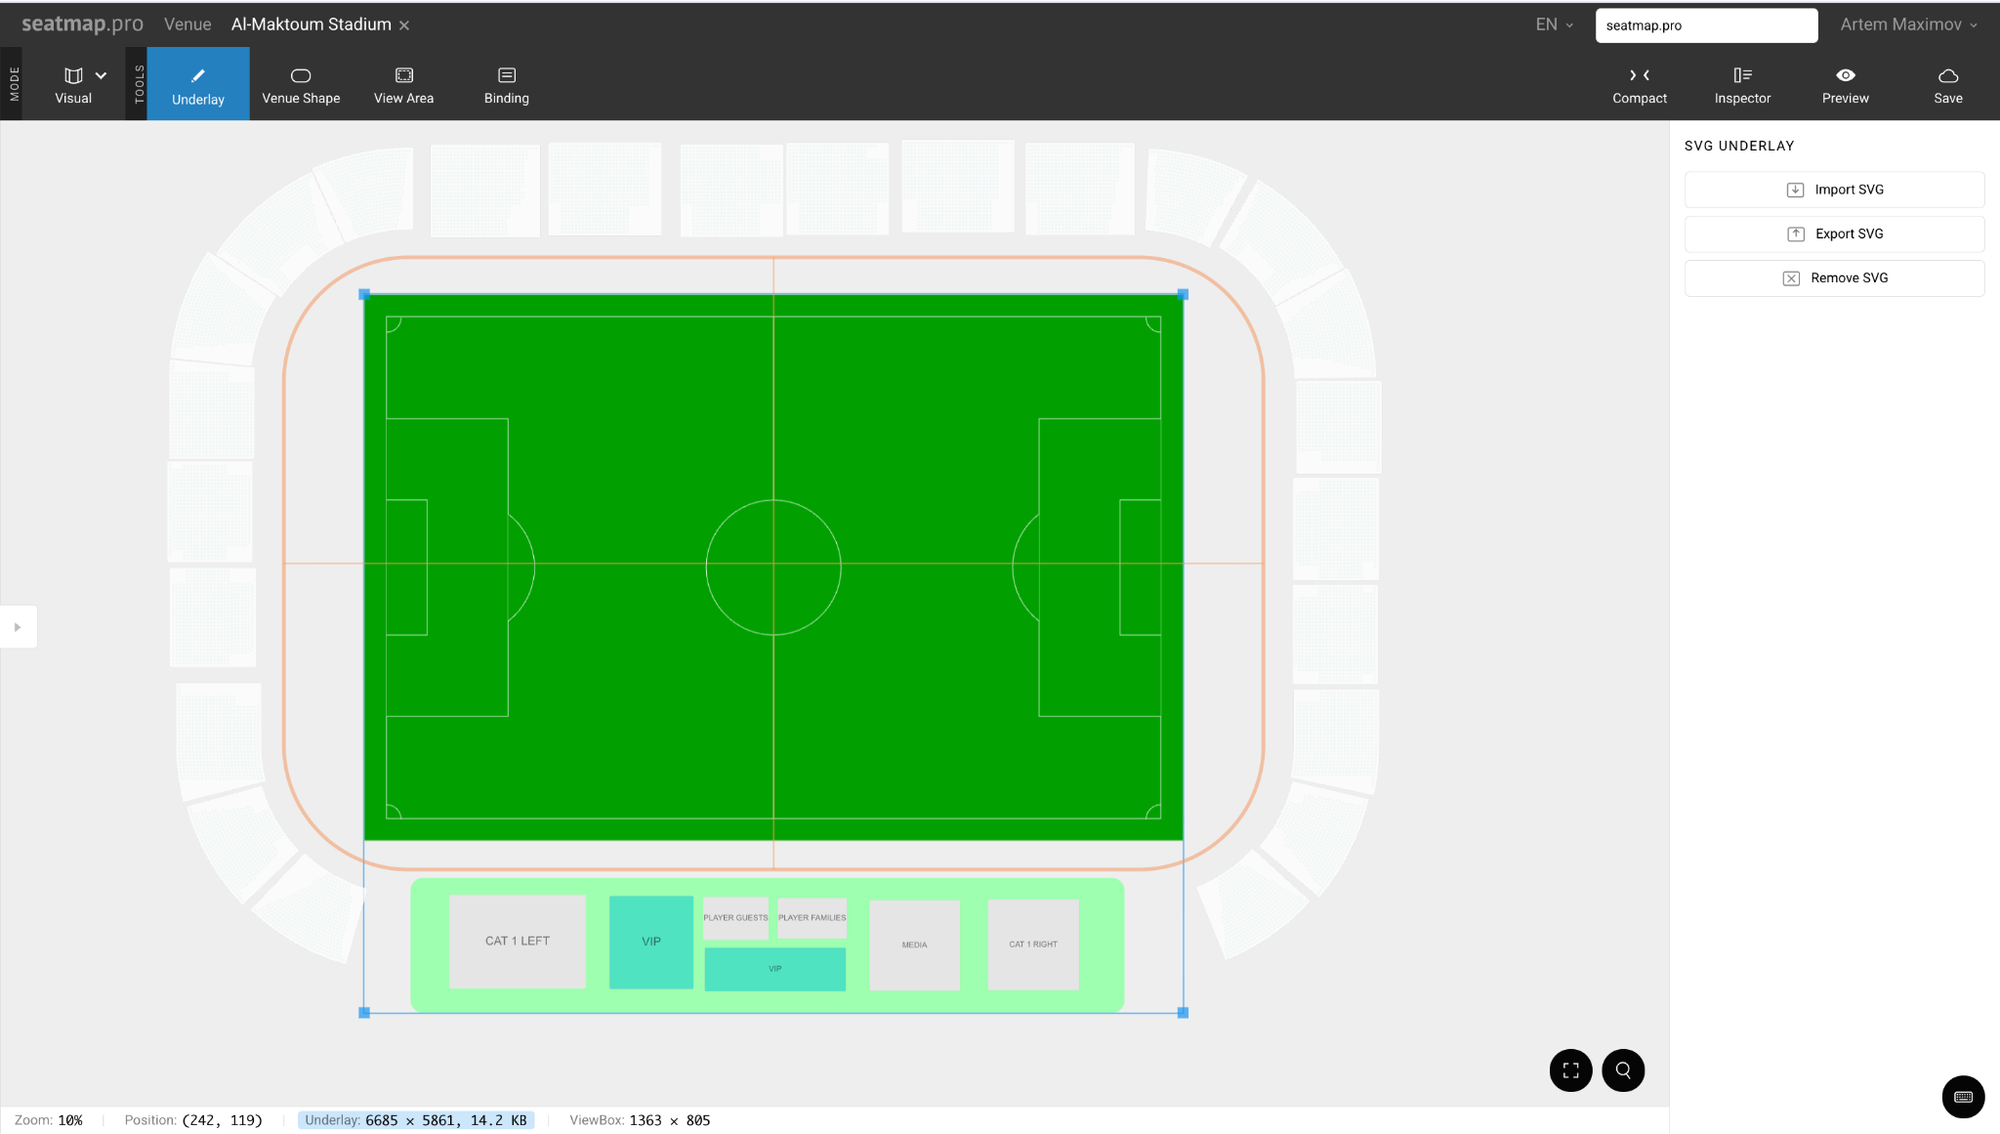
3. Re-Import the Polished Underlay
Back in Seatmap Pro → Visual tab → Underlay.
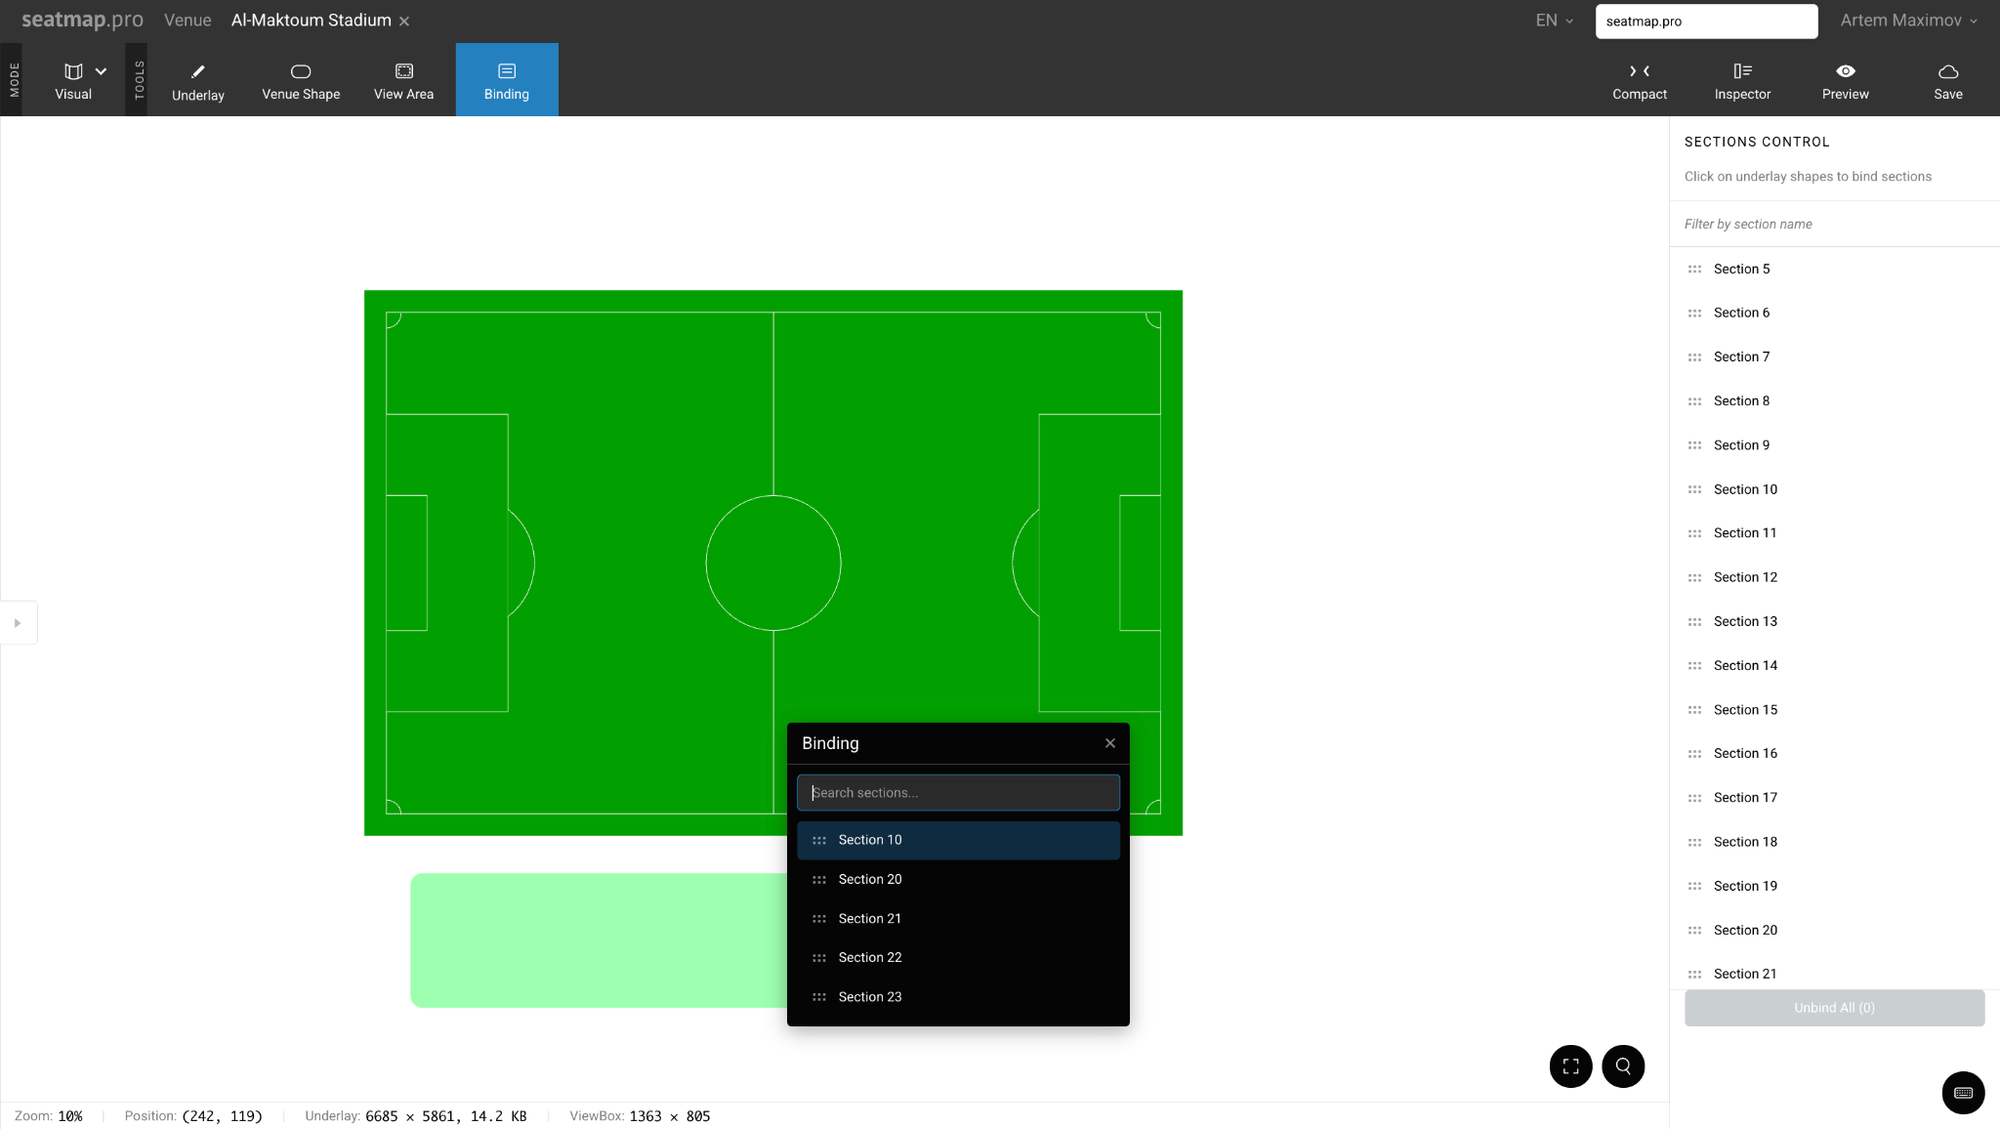
4. Optional: Binding for Easy Alignment
Switch to Binding mode (chain/link icon). If your imported SVG has clearly named or grouped section shapes, click them → bind to matching Seatmap sections. Outlines snap to the designed curves → selection looks native to the artwork.
When you are done – just save the map and hit Preview and make sure everything looks right. If anything drifts → fix in View Area (Visual tab).
Colors of seats, hover states, selection highlights, sold/available indicators – all of these are not set in the Editor. They are controlled programmatically via the Renderer settings. The editor only cares about geometry and hierarchy.
Venue Shape is still useful even in the beautiful workflow: it helps sections adhere to overall oval/corner-radius logic before you export.
That’s it. You now have two complete paths: fast for production ticketing in hours and beautiful – for client-wowing visuals without breaking sellable logic.
This release cycle combines several closely related updates to Seatmap Pro, focused on three areas: stronger administration tools in the Editor, a more
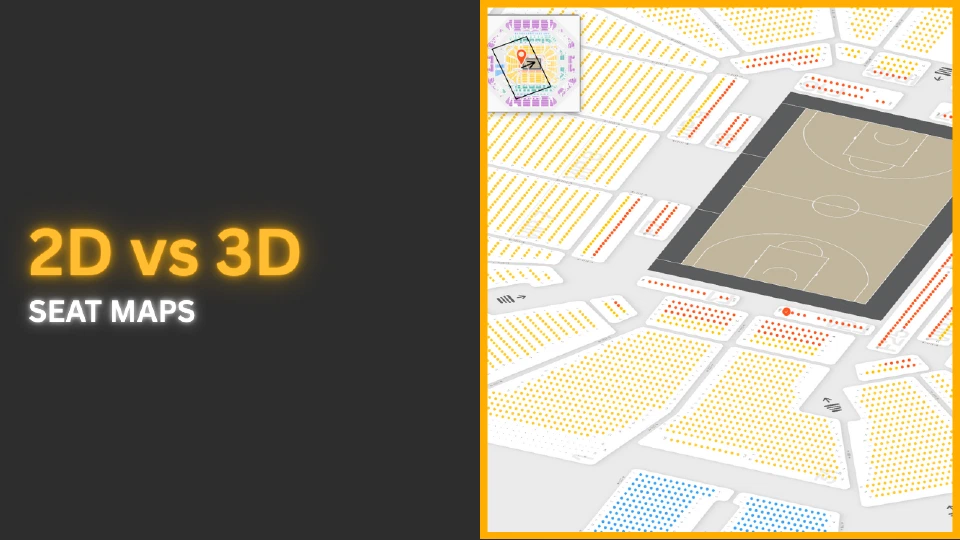
Earlier this year, we wrote about why traditional 2D seat maps — especially when paired with a “view from seat” — often outperform fully 3D maps.
Step-by-step guide to embedding interactive seat selection into your ticketing website. Use Seatmap Pro's API, renderer SDK, and editor to go live without major system changes.